
 Save
Save
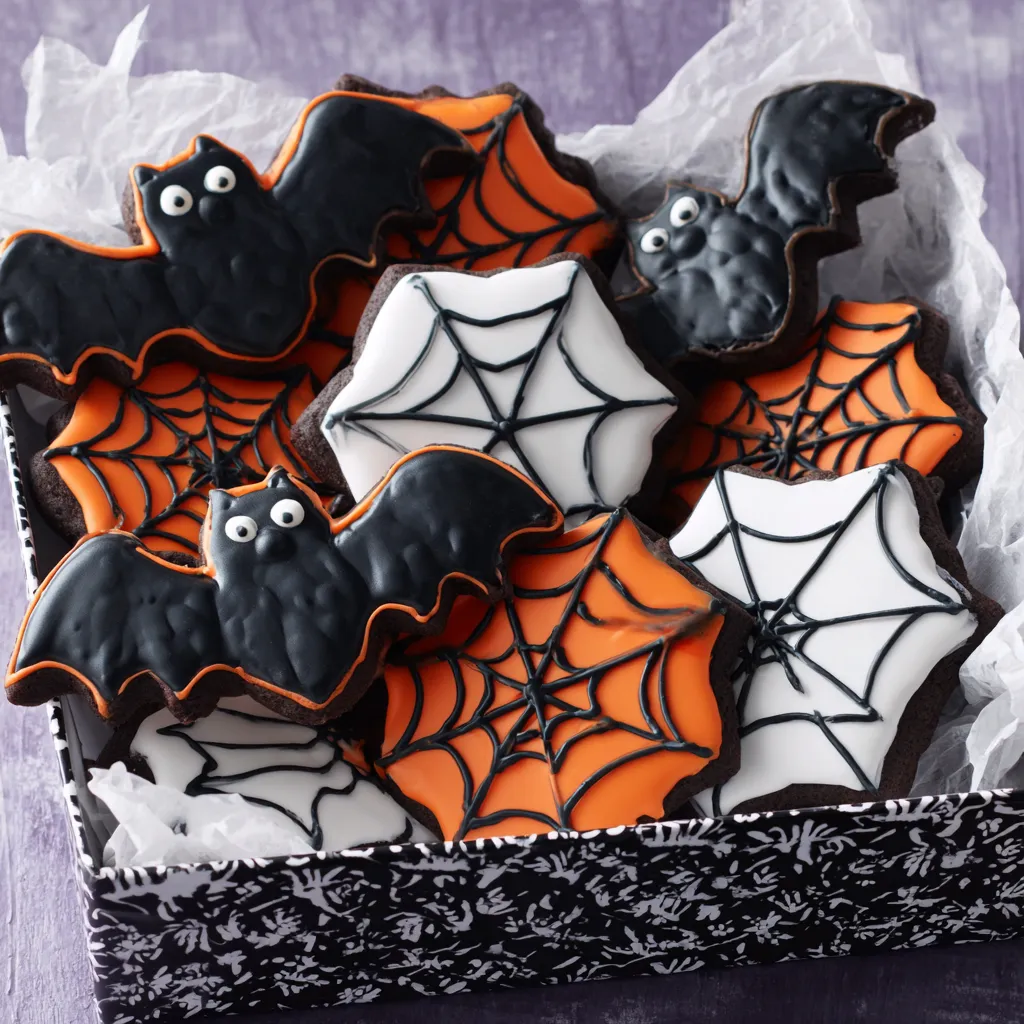
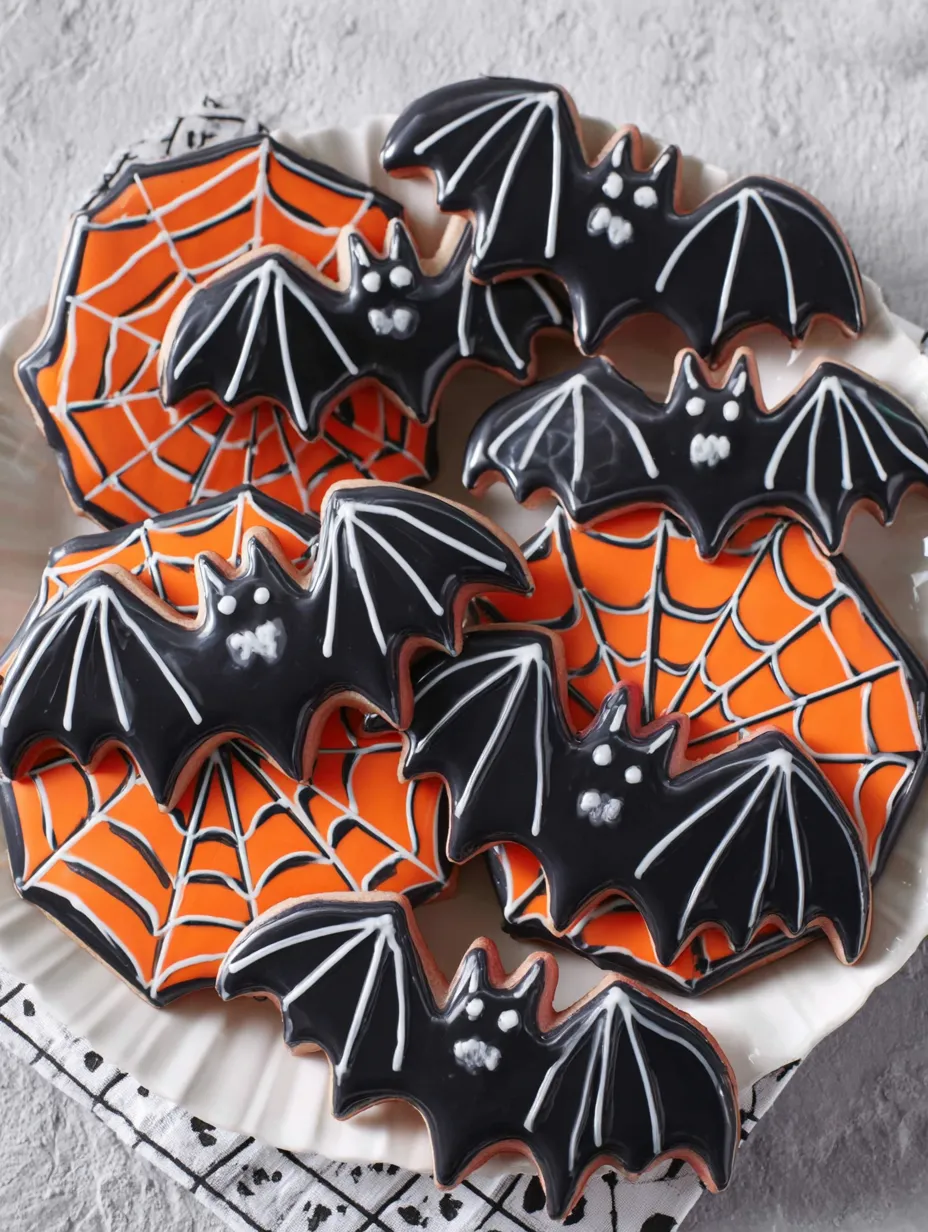
Bat and Cobweb Cookies for Halloween are my favorite way to bring a little magic to the holiday table. Spicy gingerbread-style dough gets transformed into bats and cobwebs before being finished with a creative swirl of royal icing. These cookies have become a centerpiece for our spooky gatherings because everyone loves joining in to decorate them.
The first time I made these, my sister and I spent an afternoon turning every bat into a different creature. Now it is our goofy yearly tradition.
Ingredients
- All purpose flour: gives the cookies structure so they hold their shape. Opt for a fresh bag for the best rise
- Baking soda: for the right amount of spread
- Baking powder: creates a pleasantly soft bite
- Unsalted butter: for rich flavor and helps the dough handle easily. Use butter at true room temperature
- Dark brown sugar: adds moisture and deep molasses notes
- Ground ginger: essential for classic spice warmth
- Ground cinnamon: enhances sweetness with its aromatic punch
- Ground cloves: for spicy, mysterious undertones
- Salt: balances all the spice and sweetness
- Large eggs: bring everything together and keep cookies tender
- Unsulfured molasses: gives the dough its signature taste and dark color. Look for a thick variety with no added sulfur for best flavor
- Royal icing: for decorating. Fresh egg whites or meringue powder both work well
Step-by-Step Instructions
- Sift the Dry Ingredients:
- In a very large bowl sift together the flour baking soda and baking powder to combine evenly. This step eliminates lumps and prepares the base for a smooth dough
- Cream the Butter and Sugar:
- In the bowl of a stand mixer beat the butter and brown sugar on medium high speed until the mixture is fluffy and pale. This should take about five minutes and is key for achieving crisp yet tender cookies
- Blend the Spices Then Add Eggs and Molasses:
- Add the ground ginger cinnamon cloves and salt to the butter mixture. Mix just until the aroma fills the bowl before adding the eggs one at a time. Beat in the molasses until everything is silky and uniformly brown
- Add the Dry Ingredients to Form Dough:
- Lower the mixer speed then gradually add in the sifted flour mixture. Go slowly to avoid flour clouds. Stop as soon as the dough comes together with no dry patches
- Divide and Chill the Dough:
- Tip the dough onto a floured counter and split into three pieces for easy handling. Pat each piece into a disk wrap in plastic and chill for at least an hour until firm. This ensures clean shapes later
- Roll Out the Dough:
- Preheat your oven to 350 degrees. Lightly flour your work surface and roll each chilled dough disk to one eighth inch thick so the cookies bake evenly. Slide sheets of dough onto a lined tray and chill again so they hold their edges
- Cut and Chill the Cookies:
- Press bat and cobweb cutters into the cold dough to make sharp outlines. Set the cookies onto baking sheets and refrigerate again to minimize spreading
- Bake the Cookies:
- Bake until just firm at the edges and dry on top about eight to ten minutes. Rotate pans halfway through for even color. Allow cookies to cool completely on wire racks they will crisp up as they rest
- Base Layer of Icing:
- Using a fine tip on a piping bag pipe a neat outline in your chosen color. Fill in the center with more icing and use a small spatula to smooth for a glassy finish. Let the icing set slightly before adding any designs
- Decorate Bats and Cobwebs:
- For bats pipe three curved lines across each wing. While the icing is still wet drag a skewer through the lines in opposing directions. Once dry add candy or piped eyes. For cobwebs start with a spiral of icing then drag a skewer from center to edge to create classic webs. Place decorative dots where the web connects and finish with a little icing spider
 Save
Save
My favorite part is watching everyone’s faces light up as they decorate their bats with personality. Last year my nephew gave every bat a cape and toothy fangs. The fun is in the details
Storage Tips
Layer cooled decorated cookies between sheets of parchment paper and store in a tightly sealed container for up to five days. If you need to keep them longer freeze undecorated cookies then ice after thawing
Ingredient Substitutions
If you do not have dark brown sugar simply mix light brown sugar with a tablespoon of molasses per cup. You can also swap out some of the spices for pumpkin pie spice or add a pinch of allspice for a cozy twist
Serving Suggestions
Set out these cookies alongside mugs of hot apple cider or a bowl of Halloween candy. Little bats look especially spooky perched atop a frosted cake or peeking out of lunchboxes
 Save
Save
Cultural and Historical Context
Cut out cookies have long been a holiday tradition in many cultures but the use of molasses and aromatic spices is rooted in classic gingerbread. Halloween shapes became popular in America in the last century when themed cookie cutters turned cookie decorating into a festive group activity
Recipe FAQs
- → What type of molasses works best?
Unsulfured molasses gives the cookies a rich, deep flavor and keeps them tender. Avoid blackstrap, as it’s too bitter.
- → How do I keep the cookie shapes crisp?
Chill the dough before cutting and again before baking. This prevents spreading and helps cookies hold sharp outlines.
- → Can I prepare the dough ahead of time?
Yes, the dough can be wrapped and refrigerated for up to two days, or frozen for a month. Thaw overnight in the fridge before use.
- → What is the best way to decorate these cookies?
Pipe royal icing onto cooled cookies, outlining and filling in the base color first. Add decorative touches while the base is slightly wet for smooth patterns.
- → How do I store decorated cookies?
Once icing is fully set, store cookies in an airtight container at room temperature for up to a week. Separate layers with wax paper.