
 Save
Save
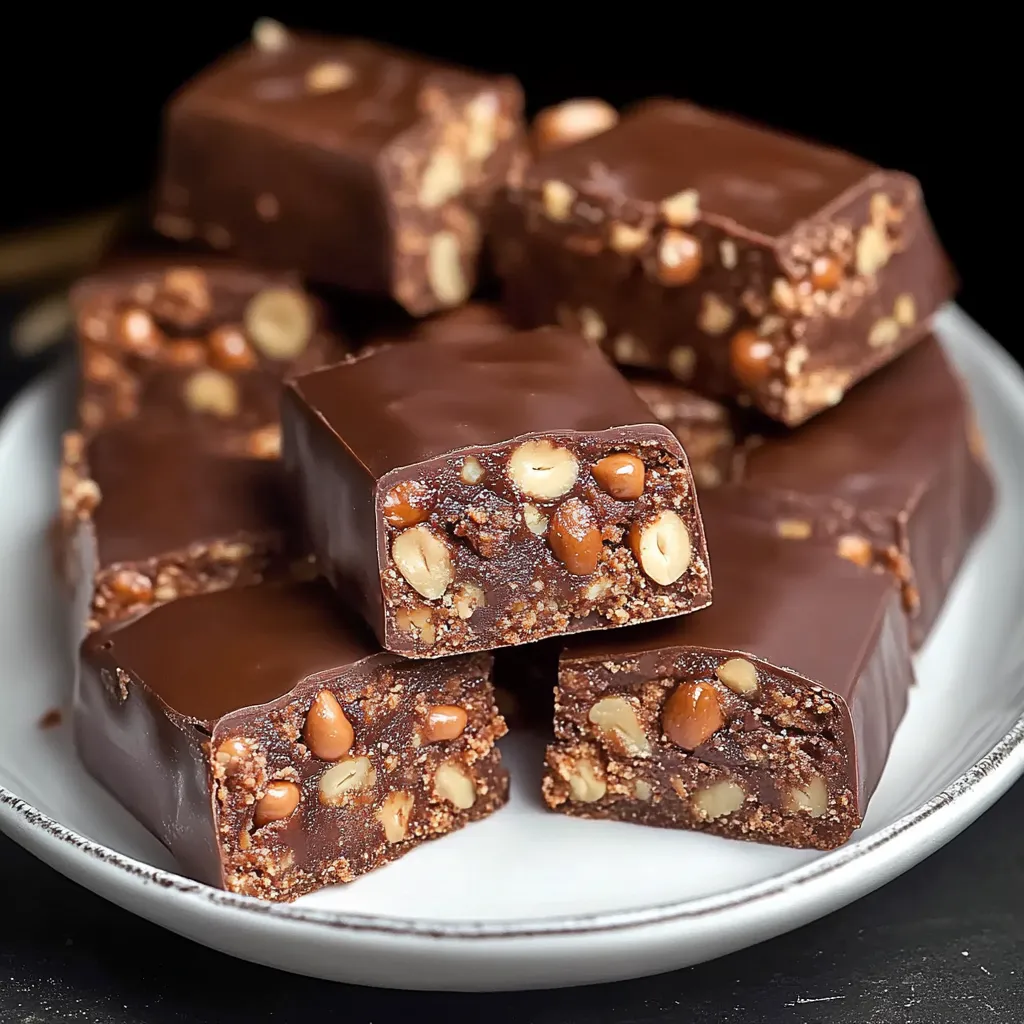
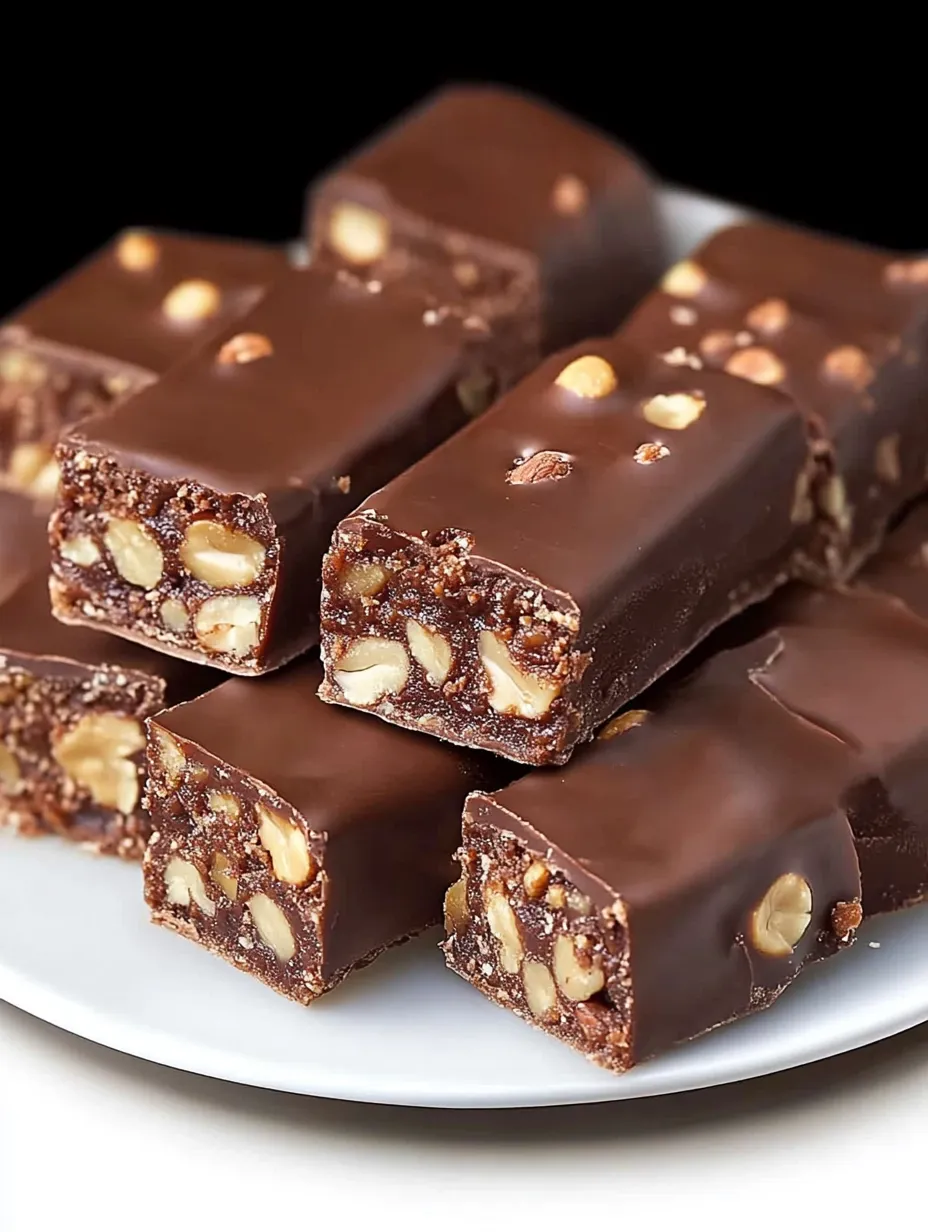
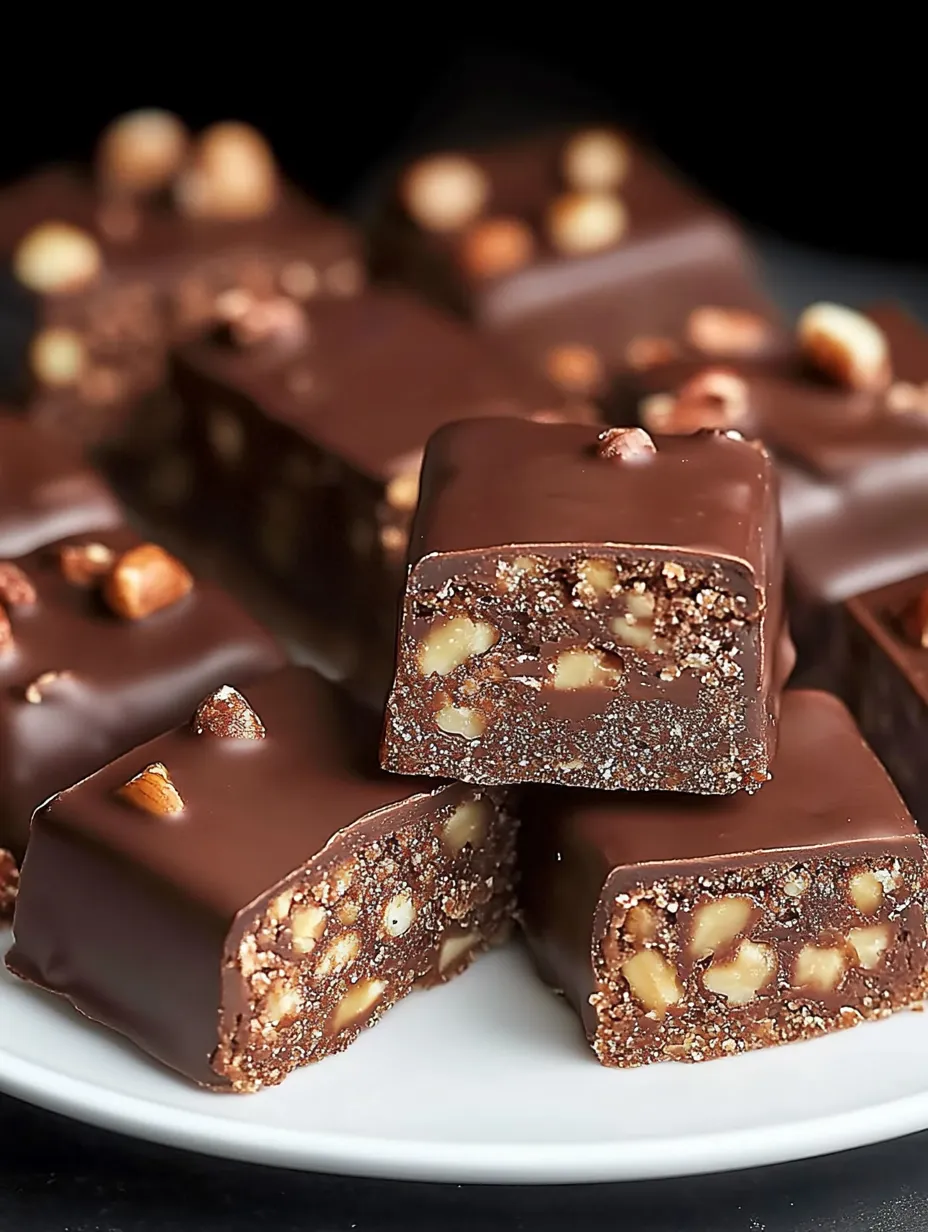
I stumbled upon these chocolate biscuit bars during an awful August hot spell five years back. My kitchen felt like a furnace, but my cravings wouldn't quit. These treats kept me sane - and now they're my fallback when I want something decadent without turning on the oven. There's this wonderful mix of crunchy cookies, nutty peanuts and silky chocolate that fools everyone into thinking you've been cooking forever. Just between you and me, the toughest part is just waiting for them to firm up.
My friend's son Jimmy is the fussiest kid I've ever known - he once turned down his own birthday cake because it "didn't look right." But these bars? He wolfed down three in one go when I brought them to a neighborhood cookout. His mom sent me a text at midnight begging for the recipe because he couldn't stop talking about them. That's when I realized I had a winner.
Essential Tools
- Biscuits: I typically use digestives or graham crackers, but practically any plain, crunchy cookie does the job. The plainer ones actually work better as they don't compete with the chocolate. One time I used leftover gingerbread cookies after Christmas and they turned out fantastic.
- Ground peanuts: Always toast them first - it just takes 5 minutes in a dry skillet and makes a huge difference. Sometimes I swap half for hazelnuts when I'm feeling fancy. Just pick unsalted ones unless you want that sweet-and-salty thing.
- Cocoa powder: Go for quality if you can. I went through a phase of buying bargain cocoa and could really tell the difference. Dutch-processed gives smoother flavor, but regular works fine in a pinch.
- Chocolate mix: That milk-dark combo isn't something I'll budge on. All milk gets too sweet and all dark gets too bitter. The 3:1 balance is just right. I've tried fancy chocolate bars versus baking chips, and honestly couldn't spot much difference once melted.
- Sweet cream: Heavy whipping cream creates that melt-away texture. I tried using milk once when I ran out of cream. Let's just say some shortcuts aren't worth taking.
 Save
Save
Kitchen Wizardry
- Base preparation:
- Smash those cookies just right - not powder, not chunks. I go for mostly tiny bits with a few bigger pieces for texture. Toss them in a large bowl with your ground nuts, sugar, and cocoa. Mix thoroughly - you don't want anyone biting into pure cocoa powder.
- Getting the moisture right:
- Melt the butter gently - I've scorched it countless times by rushing. After it melts, mix in the cream until blended. Pour this over your dry stuff and stir with a wooden spoon. It's perfect when you can squeeze some in your hand and it sticks together without dripping. Follow your gut here.
- Creating the perfect base:
- Cover your pan with parchment paper, leaving extra hanging out to lift the bars later. Pack that mixture down hard - I mean HARD. I use a measuring cup bottom and really push down. This packing step matters or your bars will crumble when cut.
- Nailing the chocolate layer:
- Melt your chocolates carefully, either in short microwave bursts or with a double boiler. Keep stirring - chocolate can go from smooth to ruined in moments if you're not watching. That bit of oil helps the coating cut cleanly instead of cracking when you slice it.
- The finishing touches:
- Spread that shiny chocolate over your chilled base, making sure to cover edge to edge. Scatter the ground peanuts on top right away - wait too long and they won't stick. I like to gently press them down with a spoon back.
My first try with these bars flopped badly - I didn't pack the base enough and ended up with crumbs everywhere. The second time, I went crazy with the cream and made something more like pudding than bars. I've tweaked everything from the cookie-to-nut balance to the cooling time. What I'm sharing now has been tested through dozens of gatherings and family events. The biggest game-changer was when I began toasting the nuts first - such a tiny step that makes an incredible difference.
Elegant Serving Suggestions
When hosting dinner guests, I slice these into bite-sized cubes and pair them with fresh raspberries and a spoonful of mascarpone cream. The slight tang perfectly balances the richness. For my morning coffee groups, I arrange them on my grandma's old cake stand with fresh mint for color pop. They also make an incredible ice cream topping - just crumble one over vanilla ice cream and get ready for pure bliss.
Fun Variations
After making these bars about a zillion times, I've tried countless tweaks. Replace half the peanuts with shredded coconut for a beachy twist. Put a tablespoon of instant coffee in the chocolate mix for a coffee version that pairs perfectly with afternoon tea. During Christmas, I sprinkle crushed candy canes on top instead of nuts. My favorite change is adding a layer of salted caramel between the cookie base and chocolate top - it takes extra work but tastes absolutely incredible.
Storage Solutions
These bars stay good in the fridge for about a week, though they've never stuck around that long at my place. Keep them in a sealed container with parchment between layers so they don't stick together. They actually hold up fine at room temp for a day or so, which makes them perfect for outdoor gatherings. You can even freeze them - just wrap single pieces and thaw them in the fridge overnight. The texture holds up surprisingly well.
 Save
Save
I've whipped up these no-bake chocolate biscuit bars for everything from kid fundraisers to swanky dinner parties. Something about their not-too-sweet depth and perfect bite appeals to practically everybody. My father, who swears he "doesn't care for sweets," has been caught sneaking one from the fridge after dark. I've busted him multiple times. While I enjoy tricky, complex recipes as much as anyone, there's something truly satisfying about making something this tasty with so little effort. Just keep quiet about how easy they were - let everyone think you spent all day in the kitchen.
Recipe FAQs
- → What's the best biscuit type for these?
- You can use tea biscuits, graham crackers, digestive biscuits, or vanilla wafers. Pick something plain with a nice crumb.
- → Can I make this without peanuts?
- Totally! Swap peanuts for walnuts, almonds, or hazelnuts. Avoiding nuts? Use toasted seeds, pretzels, or extra cookies instead.
- → What if my mixture won't stick together?
- You'll need more liquid. Gradually add cream, a spoonful at a time, until it clumps when pressed. Double-check your butter is melted too!
- → Can I use another chocolate for the top?
- Sure thing! Switch to dark chocolate for bold flavor, milk for sweetness, or white chocolate—but reduce the oil since it melts differently.
- → Do these need to stay in the fridge?
- Yup, pop them in the fridge since there's dairy involved. They'll last about a week in a sealed container. Serve cool or let them warm slightly.
- → Can I add extra flavors?
- Go ahead! Try orange zest, espresso, or a splash of liqueur. You can also mix in dried cherries or cranberries for more texture.