
 Save
Save
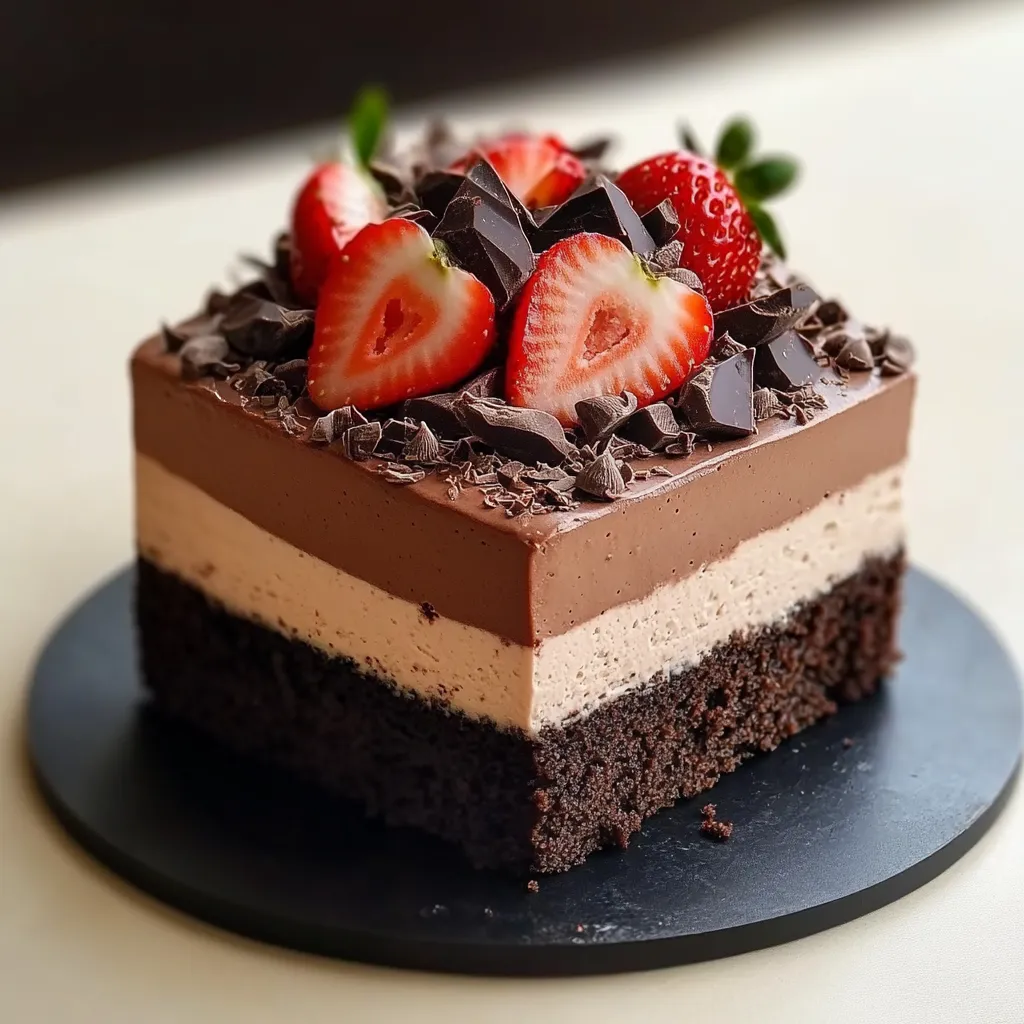
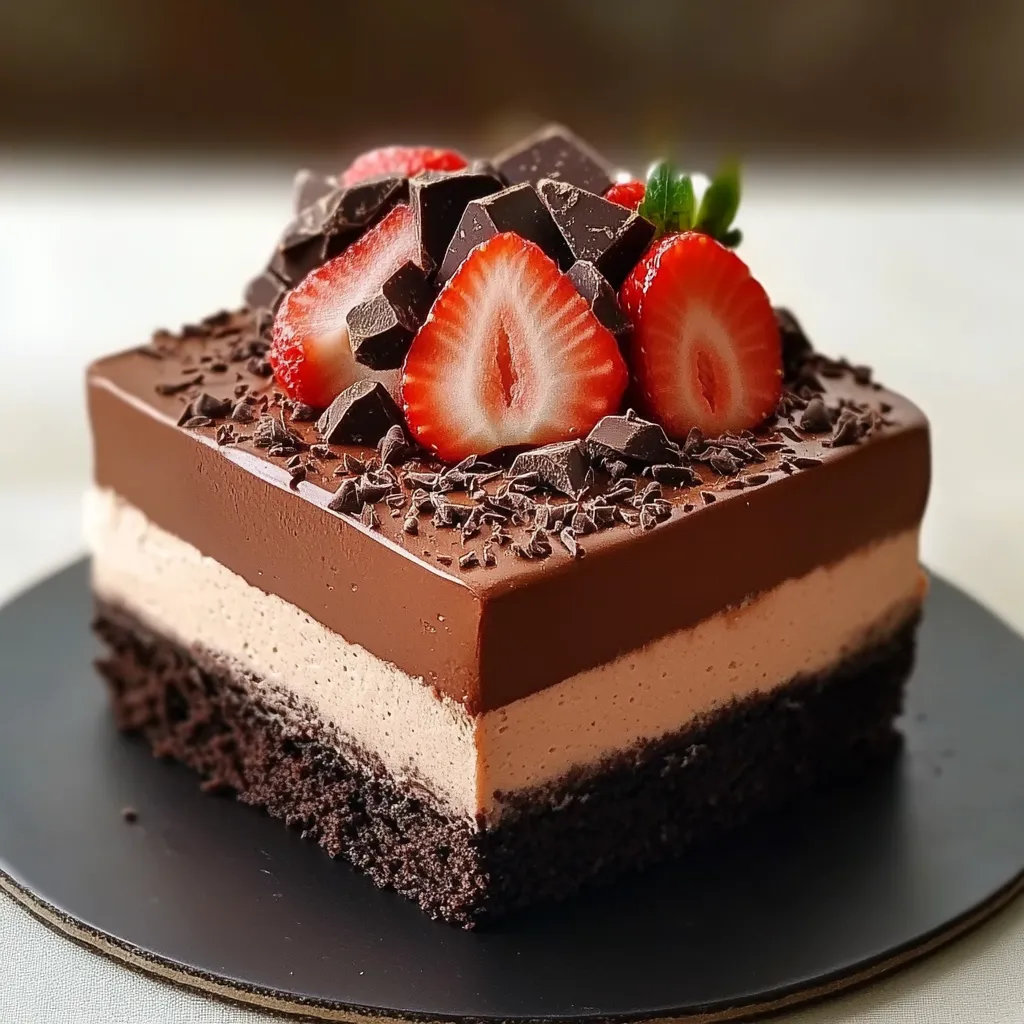
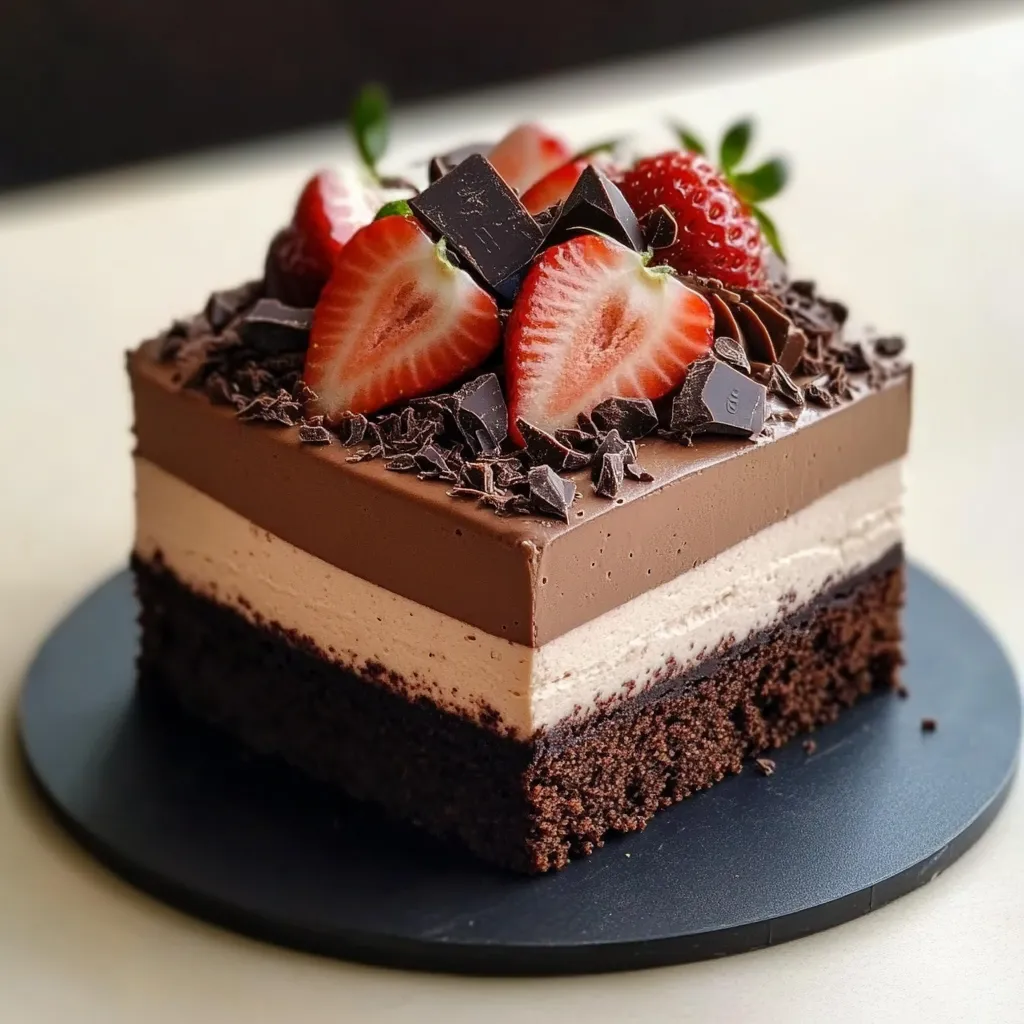
Dive into pure chocolate bliss with this triple-layered treat. You've got a super fudgy brownie as your base, a fluffy chocolate mousse on top, then a shiny ganache finish that looks amazing. Don’t let the fancy result fool you—simple stuff turns into something you’ll remember bite after bite.
I can’t count how many times I’ve whipped this up for a gathering. Everybody always gets so excited when I bring it out! All those textures together just work perfectly. Around here, it’s the go-to pick for every big get-together.
Irresistible Ingredients Lineup
- Good melting chocolate: Use brands like Valrhona or Ghirardelli so it melts easy and tastes bold.
- Eggs at room temp: These make your brownie base blend easy and turn out just right.
- Cream (heavy): Look for at least 36% fat to keep your mousse super creamy and solid.
- Cocoa powder (Dutch-process): Deepens the flavor and gives your base a rich, dark color.
- Gelatin (fresh): This is the trick for a mousse that sets and looks fantastic.
Step-by-Step Creation Guide
- Ganache Layer:
- Warm up your cream until it’s steaming, then pour it over chocolate. Stir gently until everything’s perfectly glossy and smooth.
- Mousse Mix-Up:
- Let the gelatin soak up water so it activates and sets properly later.
- Cream Whip:
- Beat the cream so it forms peaks that stand but still look shiny.
- Baking the Brownie:
- Check with a toothpick now and then. Stop baking when you see sticky crumbs, so it stays moist.
- Blending in Dry Stuff:
- Pour in sifted dry ingredients. Go easy, so you keep things soft and chewy.
- Eggs Go In:
- Add eggs one by one, mixing each in before tossing in the next.
- Melting Chocolate & Butter:
- Melt these together on low, keep stirring till everything’s shiny.
- Prep Your Pan:
- Line every edge with parchment to make lifting out the brownie easy later.
 Save
Save
I’ll tell you right now, nothing beats the corner piece of this cake. After lots of practice, I’ve learned that if you wait till the brownie is totally cool, you get perfect slices. Over here, those magical edges where the mousse meets the brownie are always first to go.
Fun Ways to Serve
Dress up your showstopper on a bold platter with a handful of raspberries and a sprinkle of cocoa. If you’re feeling fancy, add a little vanilla whipped cream on top. Don’t serve it ice-cold—let it come up a bit so the flavors really shine.
Mix It Up
Put your own spin on this by mixing in some instant espresso with the brownie batter to make it mocha. Want a cool look? Swap white chocolate into the mousse layer. Or stir crushed hazelnuts into the base if you’re after texture and a nutty taste.
How to Store
Just stash this beauty in a sealed container in the fridge and it'll stay awesome up to three days. If you want to hang onto it, freeze the slices—they’ll last for a good couple of months. Thaw them in the fridge overnight for the tastiest results.
I keep coming back to this chocolate cake because it never lets me down. Every step, from mixing to slicing, feels special. There’s just something unbeatable about piling three chocolate layers together. Each bite is a treat worth taking your time with.
 Save
Save
Recipe FAQs
- → Can I prepare this in advance?
- Absolutely! Make it up to two days early, store it chilled, and let it sit out for half an hour before slicing.
- → Why didn’t my mousse firm up?
- This can happen if the gelatin wasn’t soaked enough or if the whipped cream was too stiff. Let the gelatin soak for 5 minutes minimum.
- → Is freezing this dessert an option?
- Sure! Wrap it tightly and freeze for up to one month. Thaw overnight in the fridge to enjoy.
- → What type of chocolate should I get?
- Opt for quality bar chocolate with 60–70% cocoa. Avoid chocolate chips, which don’t melt as smoothly.
- → Why does ganache sometimes separate or get clumpy?
- Overheated cream or chocolate may be the cause. Let the cream cool a bit before mixing and stir gently until smooth.