
 Save
Save
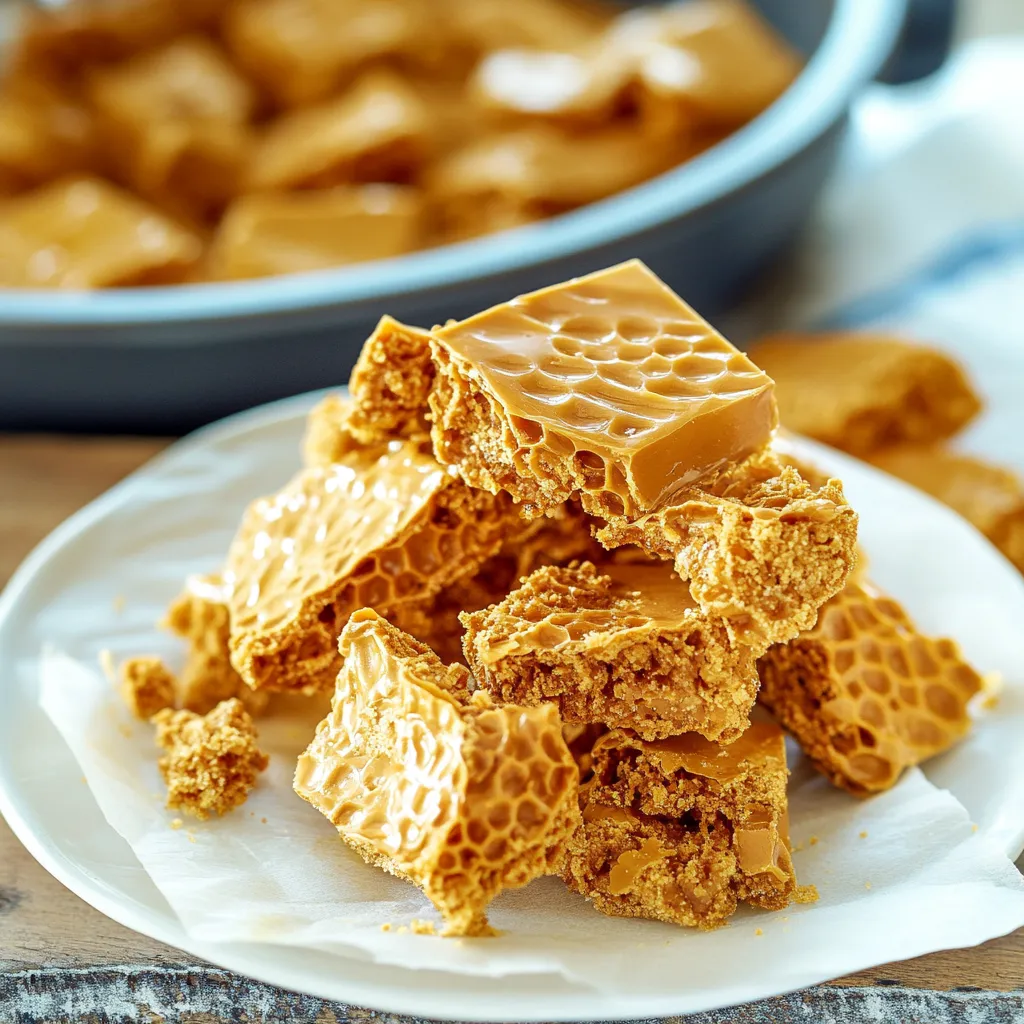
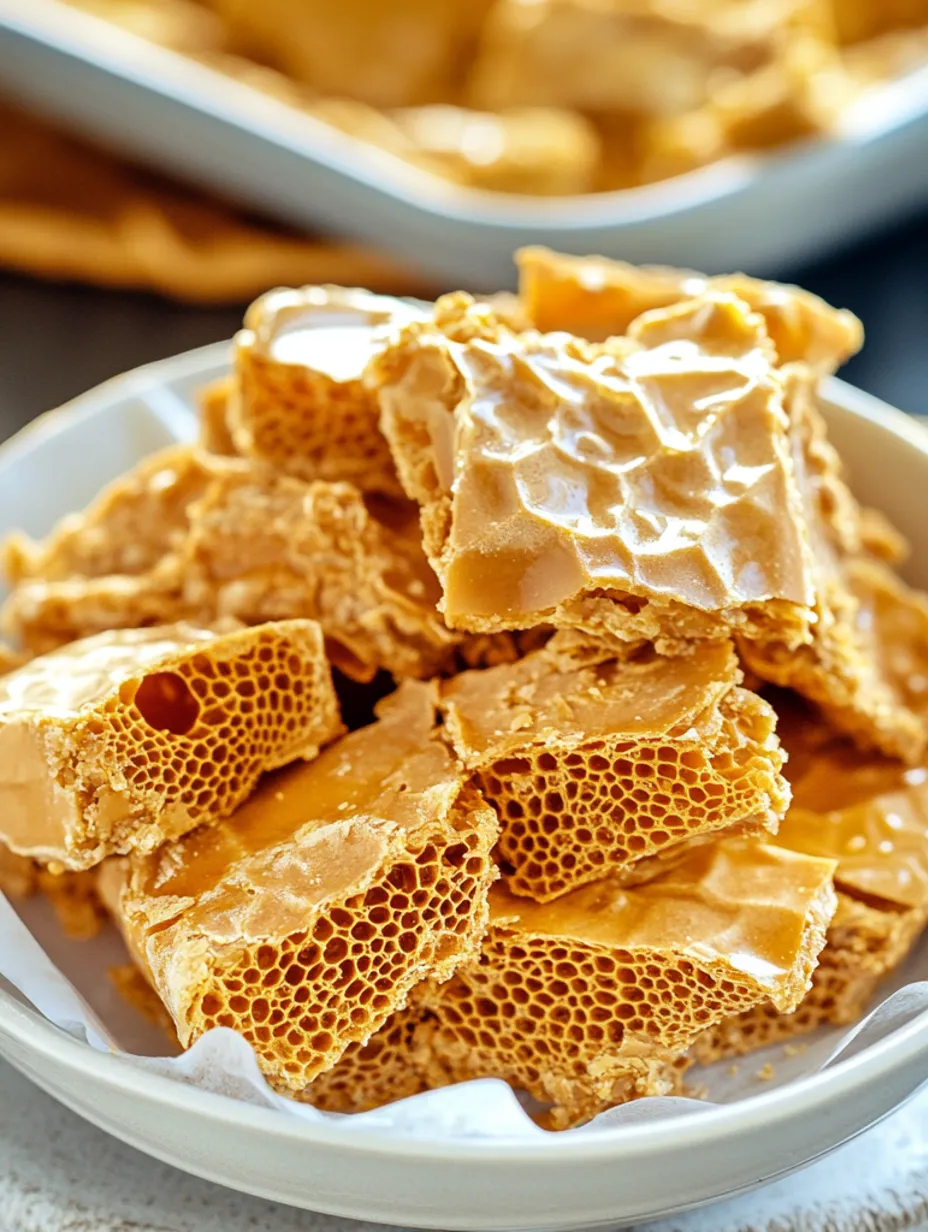
Golden airy candy turns basic kitchen staples into a wonderful, crispy sweet that breaks apart in your mouth, then dissolves into pure sugary bliss. This brittle-like delicacy with its signature honey notes and remarkable bubble structure makes an easy yet stunning homemade treat—grab some to give as gifts, dress up desserts, or just munch when sugar cravings hit.
I got started making honeycomb after seeing it on TV during a cooking competition and was shocked that such a fancy-looking sweet came from such everyday ingredients. I still get excited watching the mixture puff up when the baking soda goes in—it's like a delicious science trick that works every time.
Basic Delightful Components
- White sugar forms the foundation and gives the main sweetness to your treat
- Golden syrup stops sugar crystals forming, giving you that smooth final texture
- Raw honey adds that special taste that makes this candy famous
- Tap water helps mix everything together and lets it heat up properly
- Bicarbonate of soda triggers the amazing reaction creating all those bubbles
- Pure vanilla boosts the flavor profile and cuts through sweetness
- Table salt brings out all other tastes and adds complexity to each bite
 Save
Save
Candy Formation Technique
Smart SetupStart by putting parchment in an 8×8 inch tray with extra paper hanging over the edges for grabbing later. Getting this ready first is super important because you won't have time once things start bubbling. Get your baking soda, vanilla, and salt measured out ahead so they're good to go.
Sweet FoundationMix your sugar, water, corn syrup, and honey in a tall pot with thick walls that's bigger than you think necessary—trust me, it'll grow a lot. Clip your sugar thermometer to the side but keep it from touching the bottom of your pot. Give everything a good stir before you turn the heat on.
Careful HeatingLet this mixture cook on medium heat and don't stir it after that first mix. You'll see it start bubbling and slowly turn a nice golden brown color. Your candy thermometer is really important here—you need to hit exactly 300°F, which candy makers call the hard crack point.
Bubble MagicWhen your syrup hits the right temperature, pull it off the heat right away and quickly mix in your baking soda, vanilla, and salt. Now comes the fun part—watch as it bubbles up like crazy, often growing to three times its size as tiny air pockets form throughout.
Fast PouringMove fast but carefully as you dump the foamy mixture into your waiting pan. Don't try to spread it out or flatten it—you'll just squash all those wonderful bubbles. If needed, just give the pan a gentle shake to help it settle on its own.
Setting TimeLet your candy cool all the way at regular room temperature, which usually takes about 60 minutes. During cooling, the structure hardens and those bubbles get locked in place. Don't stick it in the fridge to hurry things up, as moisture can ruin the texture.
Smashing FunAfter it's totally cool and hard, use those paper edges to lift the honeycomb out of the pan. You can snap it into random chunks with your hands or try cutting it into more even pieces with a sharp knife. Don't worry about some bits crumbling off—that's just how this candy behaves.
The first time I tried making this candy, I caused a massive kitchen mess by picking a pot that wasn't tall enough. The stuff bubbled over the top like a volcano experiment! My counter got covered in sticky golden goo that hardened in seconds. These days I always grab my soup pot and stand ready with oven mitts to lift it off the heat fast when needed.
Ways To Enjoy It
Munch on pieces by themselves as a sweet snack, or mix them into other treats for extra pizzazz. Broken bits make an awesome topping when sprinkled over scoops of ice cream, adding both taste and crunch. Stick larger chunks onto frosted cakes and cupcakes—even plain desserts will look fancy. For something special, coat pieces in melted chocolate and let them harden for your own homemade candy bars.
Fun Flavor Twists
Want something more grown-up? Try adding a spoonful of instant coffee with the vanilla for a mocha-flavored version. During winter holidays, throw in some ground cinnamon or ginger for a seasonal treat. If you love chocolate, try pouring or dipping cooled candy in melted dark chocolate—the slight bitterness pairs perfectly with the sweet honeycomb.
Keeping It Fresh
Keep your candy in a sealed container at room temp, with layers of parchment between pieces so they don't stick together. Try to eat it within seven days, since its bubbly structure easily soaks up moisture from the air, making it sticky. Don't put it in your fridge or freezer, as the dampness will ruin the crispy texture you worked for.
 Save
Save
Handy Sweet-Making Tricks
- Cleaning hint: Soak your sticky tools in warm water and wait—all that sugar will melt away
- Slice your candy using a sharp straight-edged knife with a tiny bit of oil to stop it grabbing
- Pick a dry day to make your candy—too much moisture in the air can make it go soft
Last Christmas I took some homemade honeycomb to our family dinner, and my super-critical Aunt Dot (who hardly ever likes anything) asked where I'd bought such "fancy store-bought candy." When I told her I'd made it myself, she wouldn't believe me until I showed her a video on my phone. Now she always asks if I've "brought any of that gold bubbly candy" whenever I visit. From her, that's basically a five-star review!
Recipe FAQs
- → Why is my candy flat instead of bubbly?
- This can happen if you overmix once baking soda is added or press the mix when pouring. Baking soda causes bubbles, so handle it gently.
- → Can I skip using corn syrup?
- Yep! Swap it with golden syrup or extra honey. The syrup stops crystallization, but watching temperatures can prevent issues without it.
- → Why does my honeycomb taste burnt?
- It likely cooked too long. Use a candy thermometer and take it off the heat as soon as the temp hits 300°F to avoid burning the sugar.
- → How do I keep it from getting sticky?
- Humidity’s the culprit. Keep it in an airtight box with parchment layers. Toss in a silica gel pack or coat it with chocolate to block moisture.
- → Can I add custom flavors?
- Sure thing! Trade vanilla for extracts like almond, coffee, or orange. Just mix these in after heating, since heat can ruin the flavor.
- → Is bee honeycomb the same as this candy?
- Nope! The look is similar to a bee’s honeycomb, but this is called cinder toffee, seafoam candy, or sponge toffee depending on where you’re from.