
 Save
Save
Funeral potatoes are that dish everyone begs me to bring to all family get-togethers - Thanksgiving, Christmas, Easter, you name it. They got their gloomy nickname from being served at after-funeral meals, but trust me, they're too tasty to save for such sad occasions.
My first taste was at my neighbor's gathering about a decade ago. I embarrassed myself grabbing thirds. When I asked how to make them, three different ladies pulled out recipe cards, each claiming theirs was the "authentic" version. That's when I realized these potatoes aren't just food—they're almost a family tradition for many folks.
What You'll Need
- Frozen hash browns because who's got time to chop fresh potatoes
- Sour cream to add that rich tanginess we all want
- Cream of chicken soup from the can (zero apologies for this shortcut)
- Butter, and plenty of it—we're going for flavor, not diet food
- Sharp cheddar cheese, freshly grated if you can swing it
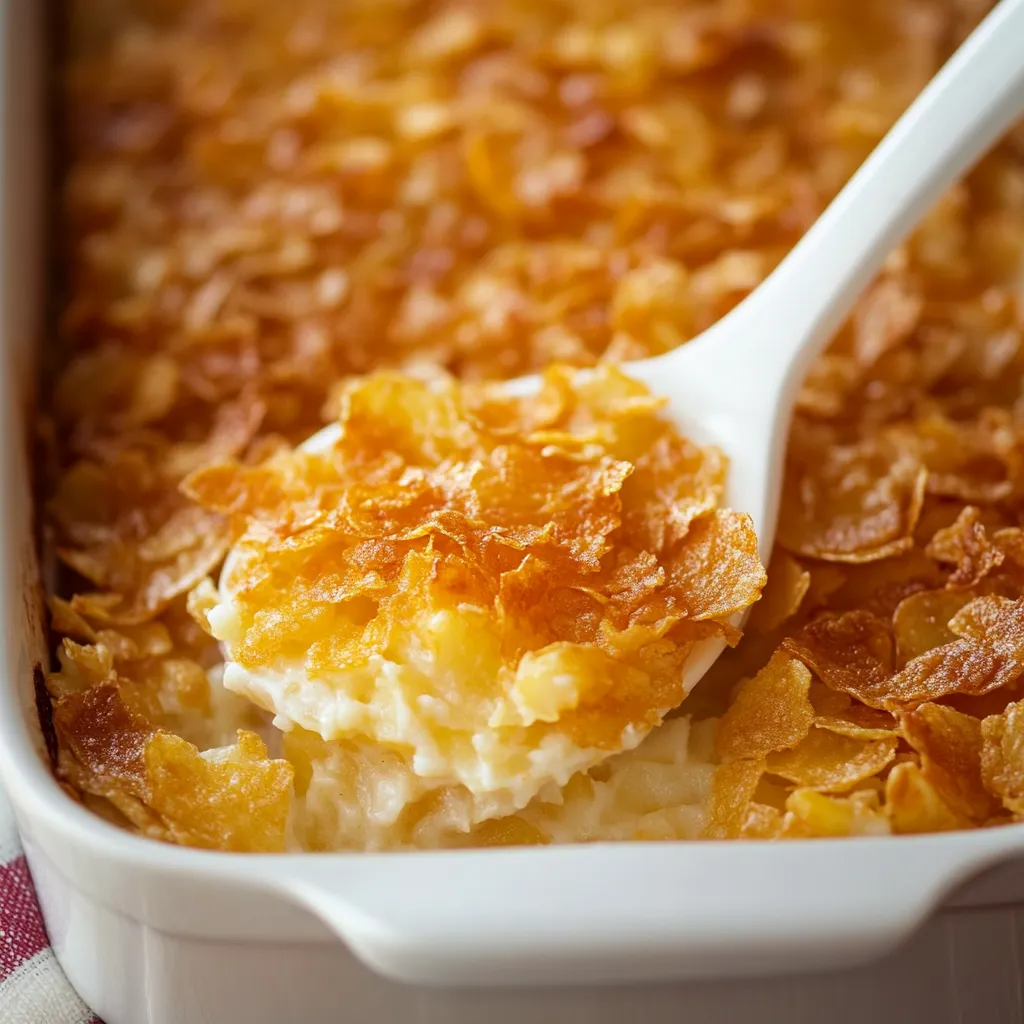
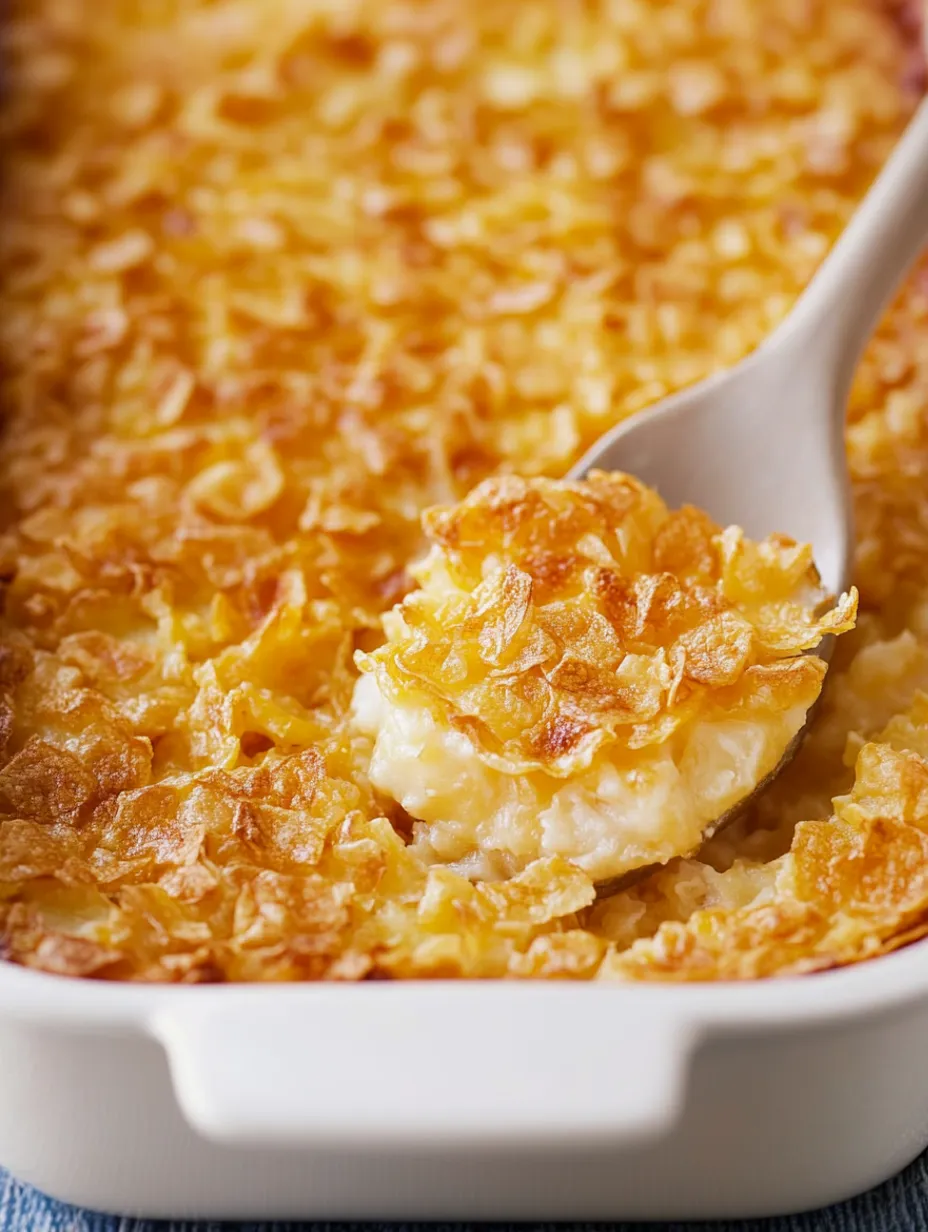
- Cornflakes to create that famous crunch that makes everyone fight for edge pieces
 Save
Save
How I Make Them
Get Those Potatoes ReadyI start by emptying the frozen hash browns into a colander to thaw fully. Don't even think about skipping this part—unless you want a soggy mess. I typically let them sit for around an hour, giving the colander a shake now and then to get rid of extra water.
The Creamy GoodnessDuring potato thawing time, I combine sour cream, soup, and melted butter in my largest bowl. It starts out looking pretty awful, I won't lie, but hang in there. Next goes in the cheese, salt, and onion powder. I sometimes sneak in a bit of garlic powder too, but that's our secret—my mother-in-law would freak out.
Bringing It TogetherAfter the potatoes have thawed, I gently mix them into the creamy stuff. Don't stir too hard or you'll mash up the potatoes. Just fold everything together until coated, then spread it all in a 9x13 dish. Glass works best so you can watch the edges get all bubbly and golden.
That Crunchy TopThe cornflake topping makes this dish special. I toss the flakes in a plastic bag with melted butter and shake it all around. This gets every bit of cereal buttered without turning it mushy. Then I scatter it all over the potatoes, making sure to cover everything right to the edges.
Bake Until BubblyIt goes in the oven until golden on top with bubbling edges, about 45 minutes. By now my house smells incredible and family members start drifting into the kitchen asking when it'll be done. You've gotta let it cool a few minutes before digging in—I learned the hard way about burning my mouth.
When I made these for my husband's family Thanksgiving the first time, his father—who normally takes tiny polite servings—loaded his plate and came back for more. Later he caught me alone and whispered, "Can you bring those potatoes at Christmas too?" Now I'm stuck bringing them to every single holiday.
Serving Ideas
These potatoes pair perfectly with holiday turkey or ham, but they work just as well with a simple grocery store rotisserie chicken on an ordinary weeknight. They're also my go-to dish for new parents or neighbors going through rough patches—it's comfort food that really comforts.
Mix It Up
I sometimes add diced ham or bacon bits when I want to make this more of a main course. Green chilies give it a nice kick if your family can handle a little heat, unlike mine. While cornflakes are the classic choice, I've used crushed Ritz crackers when I ran out and nobody minded. My aunt swears potato chips work better, but we'll have to disagree on that one.
Make It Ahead
During crazy holiday times, I often put this together the day before and stick it in the fridge covered with foil. I always wait to add the cornflakes until just before cooking though—soggy cereal ruins everything. If you're cooking it straight from the fridge, add about 15 more minutes to your baking time. I've even frozen the potato mixture without topping when making huge batches for church events.
 Save
Save
Smart Tricks I've Picked Up
- Regular sour cream works way better than low-fat versions—I've tried both and there's no comparison
- The bagged shredded cheese has stuff in it that stops it from melting properly
- Onion powder usually goes unnoticed by the onion-haters in your family
This simple casserole has somehow become my most requested dish—people text me weeks before gatherings to make sure I'm bringing it. There's something about this mix of ingredients that hits a deep comfort food spot in everyone's heart. Whether you call them funeral potatoes, cheesy spud casserole, or "that thing with cornflakes on top," they'll vanish faster than you'd expect from a dish named after funerals.
Recipe FAQs
- → Where does the name 'funeral potatoes' come from?
- It's named because it's a go-to dish at post-funeral meals, especially in Mormon communities. The recipe is easy to make for large groups and comforting for gatherings.
- → Can I swap frozen hash browns for fresh potatoes?
- Yes, but it takes more work. Peel, grate, parboil, drain, and cool about 3 pounds of potatoes first. Frozen hash browns are faster and easier.
- → How do I make this vegetarian-friendly?
- Simply use cream of mushroom or celery soup instead of cream of chicken soup. It’ll still turn out creamy and delicious!
- → How can I keep the cornflake topping from getting soft when heating leftovers?
- Cornflakes may soften in the fridge. Reheat leftovers in the oven (350°F) instead of the microwave, or sprinkle fresh buttered cornflakes before reheating.
- → Is this dish freezer-friendly?
- Yes, freeze it baked or unbaked! If unbaked, don’t add the cornflake topping until ready to bake. Thaw overnight before baking. Cooked ones freeze up to 3 months.
- → What goes well with cheesy funeral potatoes?
- Serve them with ham, roast turkey, grilled chicken, or beef. Add a fresh salad or green veggies to balance out the richness.