
 Save
Save
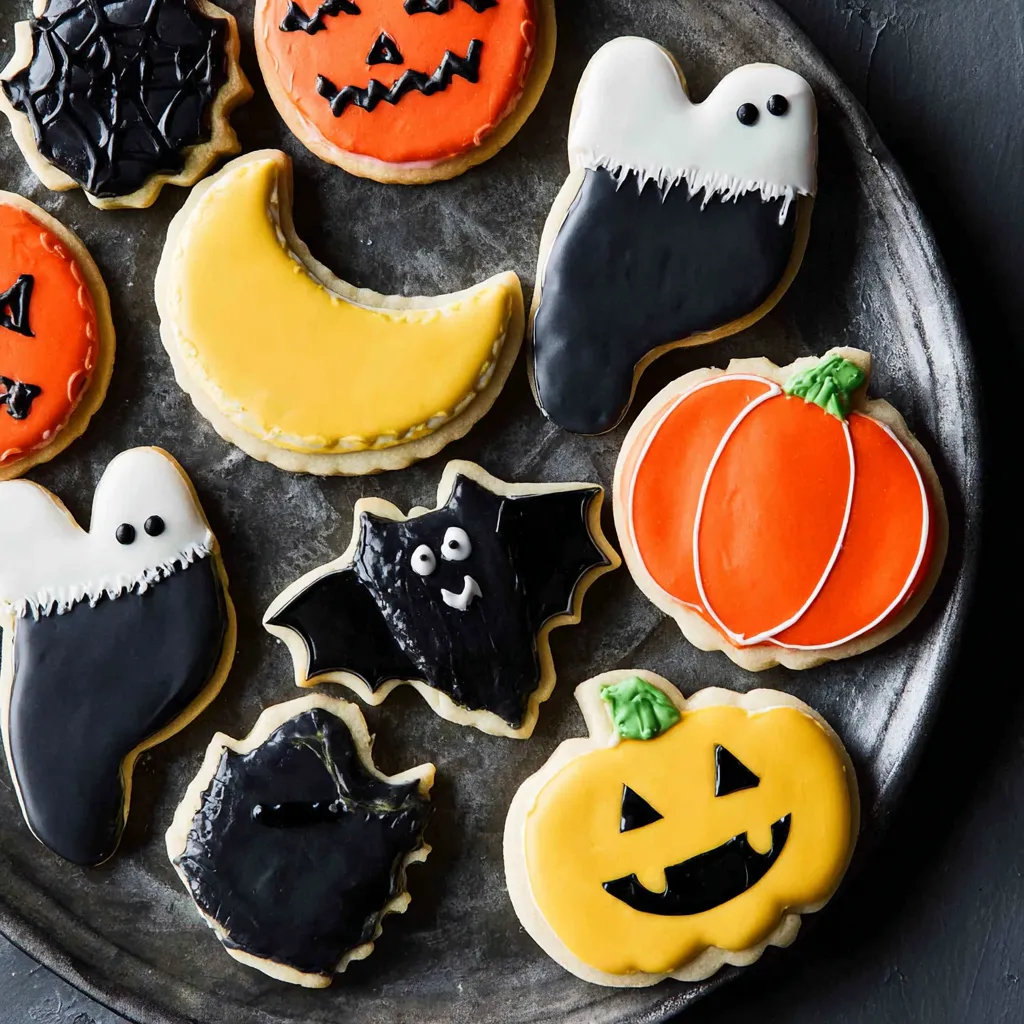
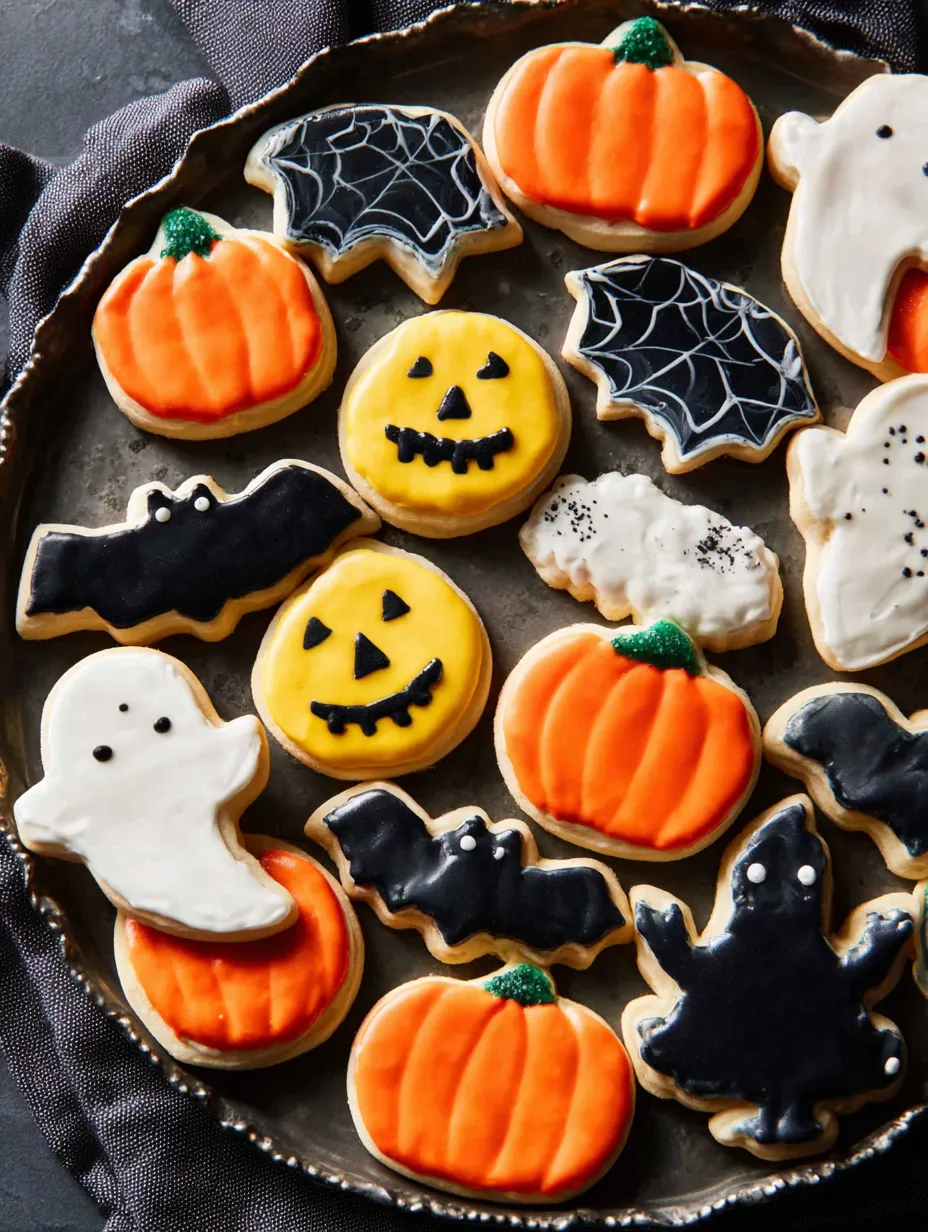
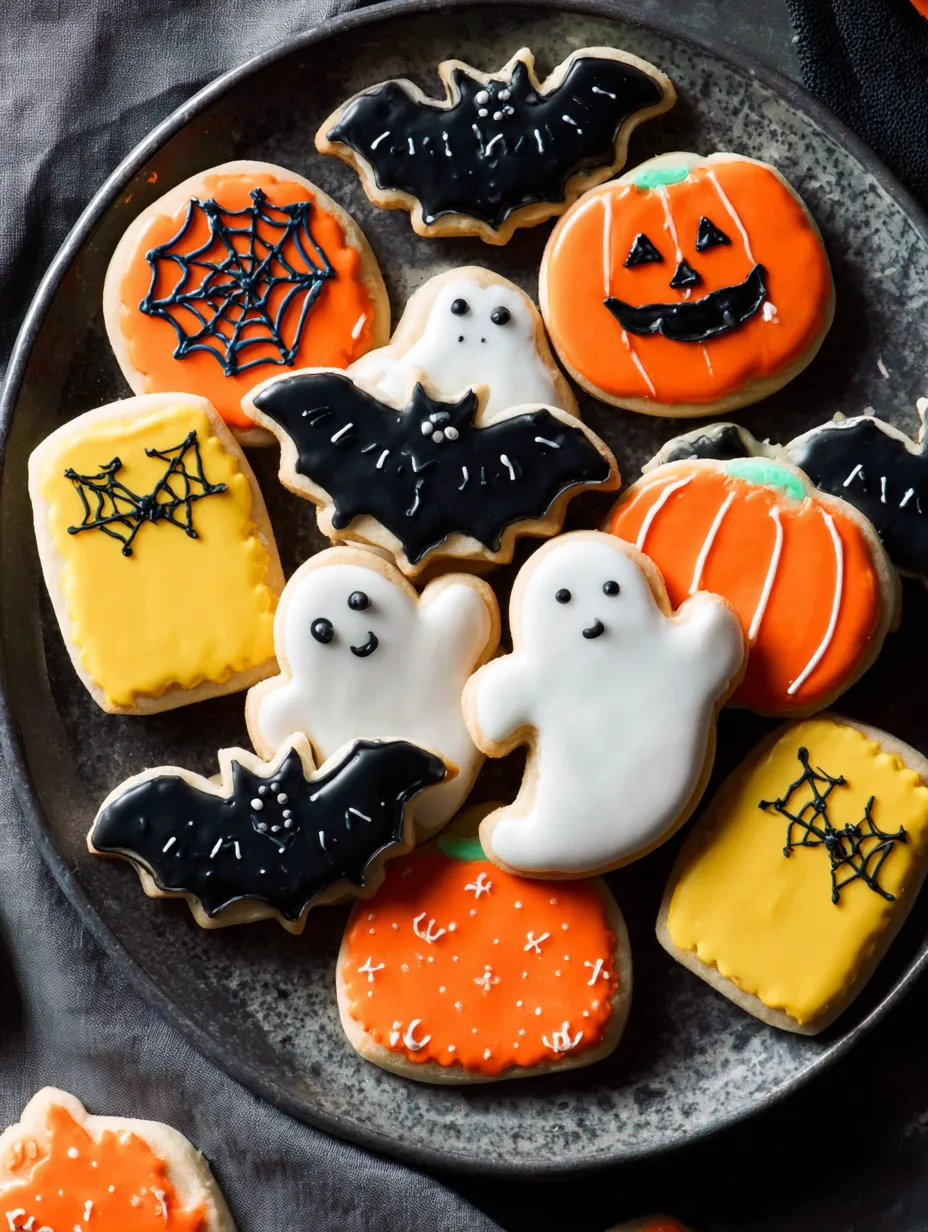
Nothing gets me in the Halloween spirit like baking and decorating a big batch of sugar cookies in spooky shapes and vivid colors. These cookies are soft but sturdy so they hold any shape you cut and the classic royal icing hardens to a perfect glossy finish. I have made these every October since my kids were toddlers and every year we dream up new ghoulish designs to share with friends and neighbors.
One year, we made a dozen different monster faces and set up a decorating contest that turned into a sweet family tradition. It is a recipe that invites creativity and laughter every time.
Ingredients
- All purpose flour: gives structure and helps cookies keep their shape Use a fresh bag and spoon into your measuring cup for accuracy
- Baking powder: adds a little lift so cookies remain tender in the center Opt for a fresh container since old leavening can lose power
- Fine salt: balances the sweetness and sharpens flavors Choose a salt with small crystals so it mixes evenly
- Unsalted butter: ensures rich buttery taste and tender crumb Allow it to soften fully for the fluffiest dough
- Granulated sugar: sweetens and helps with that subtle golden edge Choose a finer grade for ultra smooth dough
- Large egg: adds richness and binds everything together Use a room temperature egg for even mixing
- Pure vanilla extract: creates deep classic cookie fragrance Go for real vanilla for authentic flavor
- Confectioners sugar: makes silky royal icing with a shiny finish Sift well to prevent lumps
- Meringue powder: gives stability for pipeable icing Make sure it is fresh for best results
- Gel food coloring: brings bold Halloween hues These are vibrant and do not thin the icing like liquid colors
Step-by-Step Instructions
- Prepare the Cookie Dough:
- Start by whisking flour baking powder and salt in a small bowl This dry blend ensures your cookies bake up evenly every time
- Cream Butter and Sugar:
- In a stand mixer with the paddle attachment beat the softened butter and granulated sugar on medium speed for at least five minutes The mixture should be pale and fluffy which creates light cookies
- Incorporate Egg and Vanilla:
- Add the slightly beaten egg and pure vanilla extract and beat just until combined This keeps the dough tender
- Add Dry Ingredients:
- Turn the mixer to low and gradually add your prepared flour mixture Mix only until you see no dry bits This prevents tough cookies
- Chill the Dough:
- Divide the dough in half Pat into two disks Wrap each in plastic wrap and refrigerate until firm for about one hour Chilling ensures cookies hold their shapes when cut and baked
- Prepare Baking Sheets and Roll:
- Preheat your oven to 350 degrees and line two baking sheets with parchment Let dough warm slightly just a couple minutes to be easier to roll Roll out one disk between two sheets of parchment to one eighth inch thick
- Cut and Arrange Shapes:
- Use your favorite Halloween cookie cutters to cut shapes Place them about two inches apart on lined sheets Gather and chill the scraps for later rerolling
- Bake the Cookies:
- Rotate and switch the pans halfway through Bake until the edges are just turning golden usually ten to twelve minutes for that perfect balance of soft and crisp Cool on the sheet for five minutes then transfer to a wire rack until completely cool about one hour
- Prepare Royal Icing:
- Beat confectioners sugar meringue powder and one third cup water in a stand mixer with the whisk attachment on medium high until stiff peaks form about five to six minutes Divide and tint with gel colors as needed for your designs
- Make Flood Icing:
- Thin three quarters of your colored icing with a little water at a time until you achieve a smooth flowing consistency It should flow back in about ten seconds when a knife draws through This makes it easy to fill in shapes
- Decorate the Cookies:
- Use thicker icing fitted in a small tip bag to outline your shapes then fill with flood icing Let each layer harden fully about six hours or overnight for best results Add faces details and accents with thick icing Allow details to set at least one hour before handling or packaging
 Save
Save
My personal favorite ingredient is real vanilla extract A splash in both dough and icing adds warmth I remember my little ones gathering around to help with piping ghost faces each adding their own silly twist
Storage Tips
Let iced cookies dry completely before storing Layer them in an airtight container with parchment between each layer Store at room temperature for up to five days For longer storage freeze undecorated cookies and thaw before icing
Ingredient Substitutions
If you do not have meringue powder powdered egg whites will also work If you need to make the cookies dairy free use plant based butter but watch the texture since it softens faster than dairy butter
 Save
Save
Serving Suggestions
Arrange these cookies on a platter with festive sprinkles or pack individually in cellophane bags for classroom parties The shapes and colors make them a slam dunk for any Halloween dessert table Offer extra icing colors at decorating parties so everyone can design their own treat
Cultural and Historical Context
Sugar cookies in themed shapes have been part of American holiday traditions for generations Halloween cookies blend this tradition with the playful spirit of October using familiar shapes from folklore and pop culture These treats invite family creativity and celebration
Recipe FAQs
- → How do you achieve the perfect cookie shape for Halloween designs?
Chill the dough thoroughly to prevent spreading. Use well-floured cookie cutters and roll the dough to an even thickness for crisp shapes. Cut and bake similar shapes together for even results.
- → What is the secret to smooth royal icing decorations?
Mix confectioners' sugar, meringue powder, and water until stiff peaks form, then adjust with water for a pourable 'flood' consistency. Tint with gel coloring for vibrant hues.
- → How do you prevent cookies from becoming dry during baking?
Bake just until the edges turn golden brown, and avoid overbaking. Rotating baking sheets can help with even browning and texture.
- → Can the dough or icing be made ahead of time?
Yes, the dough can be chilled for up to 24 hours and icing can be made in advance; cover tightly to prevent drying out before piping.
- → What are some creative Halloween shapes to try?
Cats, ghosts, pumpkins, and candy corn are classics—try bats, witches' hats, or spooky eyes for variety.