
 Save
Save
I found this mint chocolate muddy buddy mix by chance when my sis needed something green for her work's St. Patrick's Day party. Between you and me, I wasn't looking forward to making another batch of green cupcakes topped with shamrock sprinkles. This turned out SO much better - the Chex gets this yummy chocolate-mint layer and honestly, folks just can't stop grabbing more.
When I tested this recipe, my boy had his gaming friends over. Those hungry teens finished the WHOLE BOWL in roughly 15 minutes! One kid even followed me to the kitchen asking for more. Getting approval from teenage boys is basically the ultimate food compliment.
Basic Components
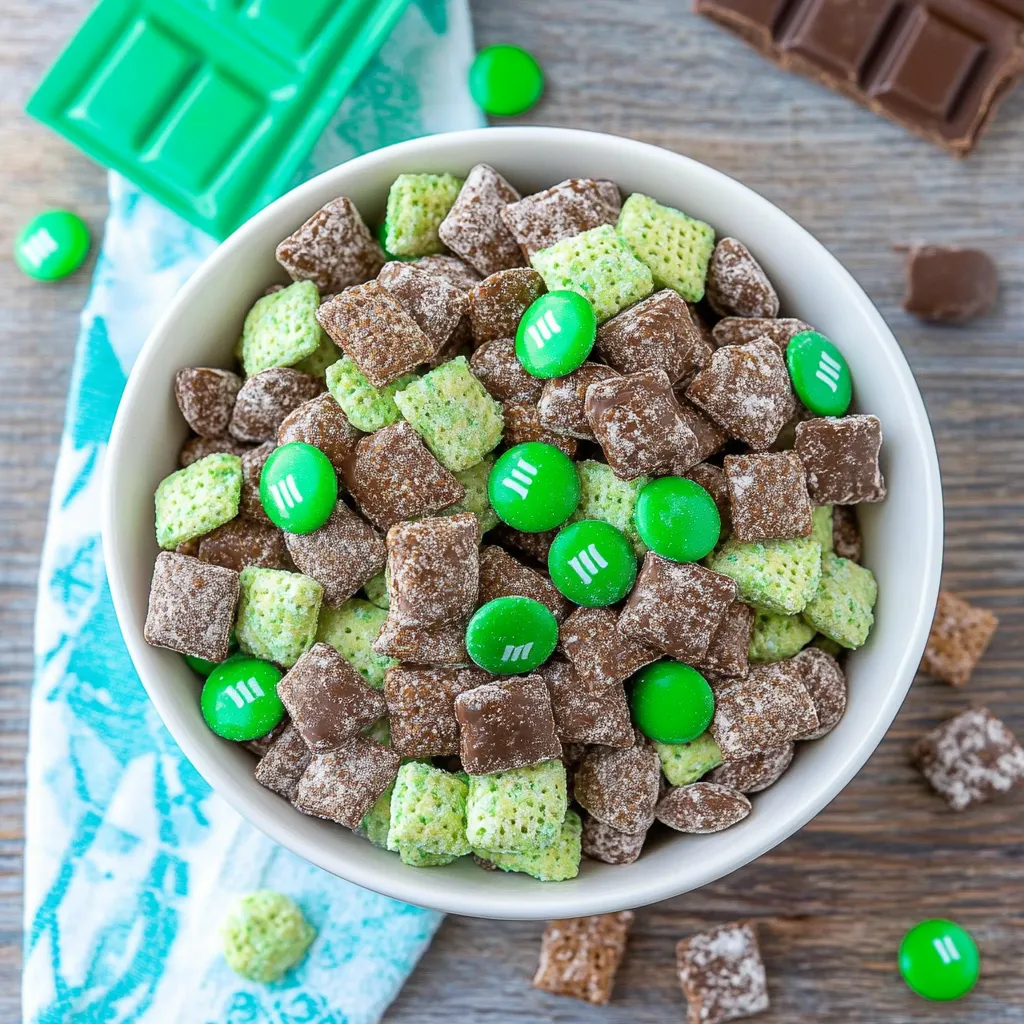
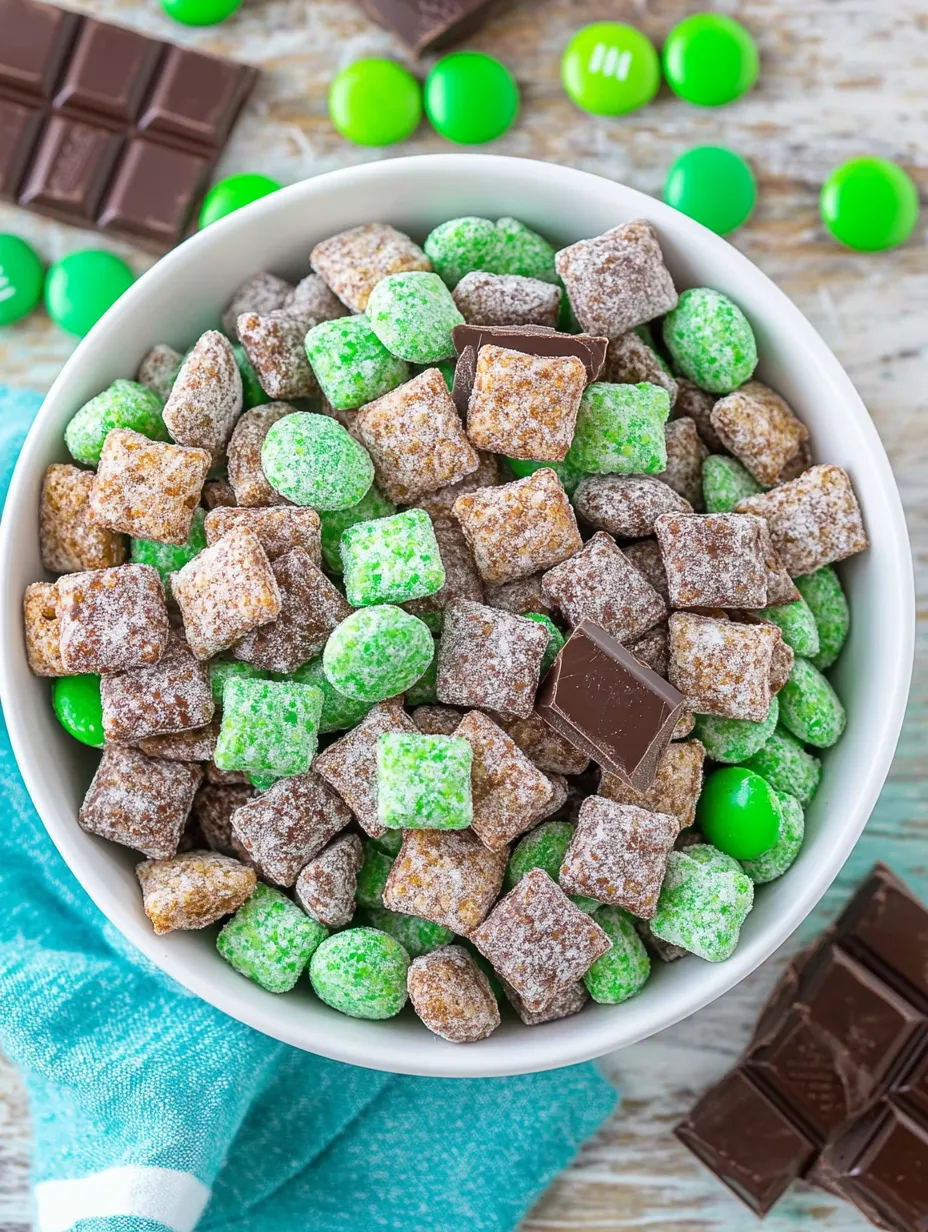
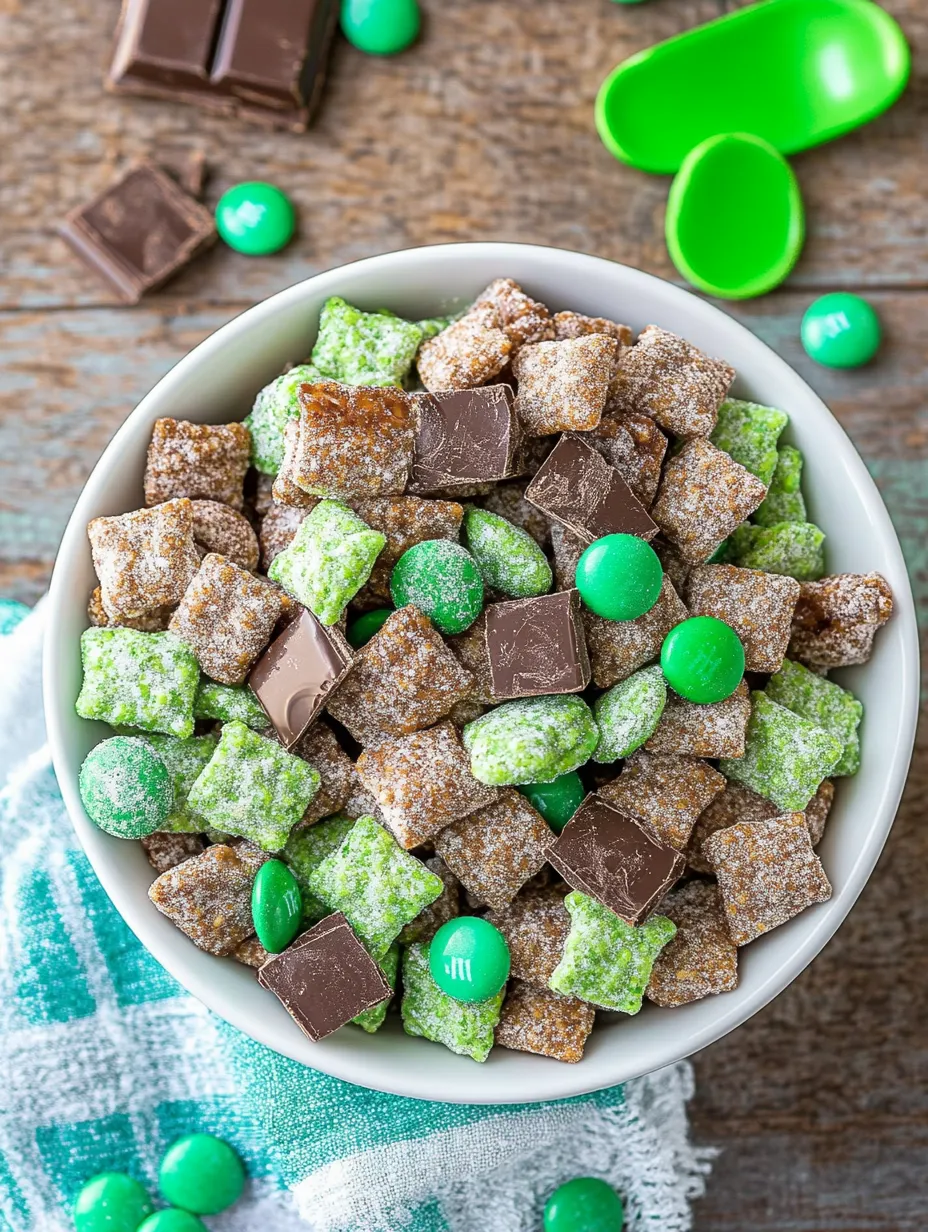
- Chex cereal - Both corn and rice work fine, though I tend to like rice better here
- Chocolate chips - Semi-sweet is my go-to but milk chocolate works if that's what you enjoy
- Green candy melts - Look for these in craft shops or your grocery's baking section, they're colored chocolate discs
- Powdered sugar - This is essential for that classic muddy buddy outer layer
- Add-ins - Adding Andes mints and mint M&Ms makes everything extra minty and festive
 Save
Save
Making Magic Happen
- Chocolate Melting
- Don't rush melting your chocolate! I ruined a batch once by being hasty and ended up with a grainy, useless mess. I follow the short microwave bursts in the recipe, and actually stir even when nothing seems melted yet. One trick my grandma showed me - put a tiny bit of shortening in with the chocolate chips before melting. It helps them coat the cereal much better. Some folks use coconut oil but I sometimes notice that flavor afterward.
- Candy Melt Handling
- The green candy melts can be tricky. Make sure your bowl is completely dry before starting - just a tiny water drop will turn them into a gritty mess. I once accidentally got water in mine and had to throw everything away. They're usually thicker than normal chocolate when melted, so I typically add some shortening to these too. And wow, that bright green looks awesome next to the brown chocolate when it's all mixed.
- Coating Strategy
- I've tried coating in both a bowl and using bags, and trust me - bags work so much better. Something about shaking gets every piece coated perfectly without breaking the cereal. Just don't put too much in your bag! I did that once and powdered sugar went everywhere. For a full batch, split it between two bags as the recipe mentions. And double-check those bags are fully closed before shaking!
- Mix-in Distribution
- I chop the Andes mints smaller before adding since whole pieces often sink to the bottom. The M&Ms spread out pretty well on their own. I've noticed that adding candies while everything's still slightly warm helps them stick to the cereal pieces instead of collecting at the bottom. My kids always try to pick out all the M&Ms if I don't do this, which really bugs me.
- Cooling Process
- That quick fridge chill is important - it helps everything set. But don't forget about it or it gets too hard. I left mine in for about an hour once and the texture was completely off. After the 10 minutes cooling, I usually spread everything on waxed paper briefly before storing it. This prevents moisture that might make it soggy.
- Storage Solutions
- This stuff stays good in an airtight container, though it never lasts more than a couple days at my house. My hubby grabs handfuls whenever he walks through the kitchen. For my sister's work party, I put portions in clear treat bags tied with green ribbon, and her coworkers thought they looked super fancy. If you notice it getting sticky after storage, just add another spoonful of powdered sugar and shake again.
My husband always claims he "doesn't like sweets" but I caught him eating this straight from the container while standing in front of our open fridge at midnight. He had powdered sugar all over his face! There's just something about mixing mint and chocolate that gets everyone hooked.
Tasty Companions
We enjoy this during family movie nights, sometimes mixed with popcorn which sounds strange but tastes fantastic. When friends come over, I serve it alongside coffee or hot chocolate, and it vanishes quickly. Last Christmas I gave small jars as gifts to neighbors, and the lady next door messaged me late that night saying they'd finished the entire jar in one sitting and wanted to know how to make it.
Fun Twists
You can swap the candy melt colors based on holidays - try orange for Halloween, red for Valentine's Day, and so on. I've used different seasonal M&Ms too. Once I tossed in some broken pretzels for a sweet-salty combo, and that was really good. My sister puts a few drops of peppermint extract in the chocolate for stronger mint flavor, but I think the Andes and M&Ms add plenty of mintiness already.
 Save
Save
I've brought this mint muddy buddy mix to school events, game nights, and holiday parties, and it's always the first snack to run out. There's something about that mix of crunch, chocolate, and mint that makes people reach for more. My daughter's teacher wanted the recipe after our class party and said it was the tastiest muddy buddy version she'd ever had. I won't lie, I felt pretty proud about that comment for several days.
Recipe FAQs
- → Can I swap Chex for other cereals?
- Sure, you can try different cereals! Rice or Corn Chex are classics, but Crispix or even plain Cheerios work too. Just pick cereal with nooks that hold the coating well.
- → What can I use instead of green candy melts?
- White chocolate chips tinted with green food coloring work great. Oil-based coloring pairs best with chocolate. Or try mint-flavored green baking chips like Andes.
- → How long do these stay good?
- Store them airtight at room temp to keep them fresh for 1-2 weeks. In the fridge, they'll last up to 3 weeks. Freeze them for up to 3 months—they're great cold too!
- → Can I adjust this for other holidays?
- Totally! Just switch the colors and candy. Red and green for Christmas, pink and red for Valentine's Day, or pastels for Easter. Lots of options to match any holiday.
- → Why is my chocolate clumping when melting?
- Chocolate clumps up when wet or overheated. Make sure your tools are dry and heat it in short bursts, stirring often. If it clumps, add a teaspoon of vegetable oil and stir hard to fix it.