
 Save
Save
I came across this Easter-themed chocolate chip cookie idea when looking for a fun baking project with my little ones during their spring break last year. The way these treats blend traditional chocolate chip goodness with swirly pastel colors makes them not just tasty but absolutely gorgeous to look at. They've now become a must-make in our family each Easter, and we enjoy making them almost as much as eating them.
When we baked these, our kids had friends over who watched in amazement as the colorful dough took shape. Later that evening I got a message from their mom asking how to make what her children kept calling the "magic swirl cookies." It's funny how a simple twist can turn an everyday treat into something everybody talks about.
Basic Components
- Butter and sugars - They work together to create that irresistible chewy bite we all crave
- Gel food coloring - Packs more color punch than the liquid kind without making your dough watery
- Chocolate chips - Add the perfect sweet counterpoint throughout each cookie
- Vanilla extract - Brings that cozy, familiar smell and taste that makes cookies feel homemade
- Regular baking staples - Just your typical pantry ingredients that go into any cookie recipe
 Save
Save
Baking Breakdown
- Butter Temperature
- Your butter needs to be just right—soft but not melty or cold. I typically set mine out about 60 minutes ahead of time, or I sometimes dice it into small pieces to speed things up. When you mix it with the sugars, you'll notice it getting fluffier and lighter. This step builds the foundation for perfectly chewy cookies. I tried rushing once with partly melted butter and ended up with flat cookies that still tasted good but lost their ideal shape.
- Mixing Method
- Put in one egg at a time and mix well between each one for the smoothest possible dough. When you add your dry stuff, only mix until you can't see flour anymore—too much mixing makes cookies tough. I often drop the electric mixer and grab a wooden spoon at this point to avoid overdoing it. Don't worry about tiny lumps, they'll disappear while baking.
- Coloring Strategy
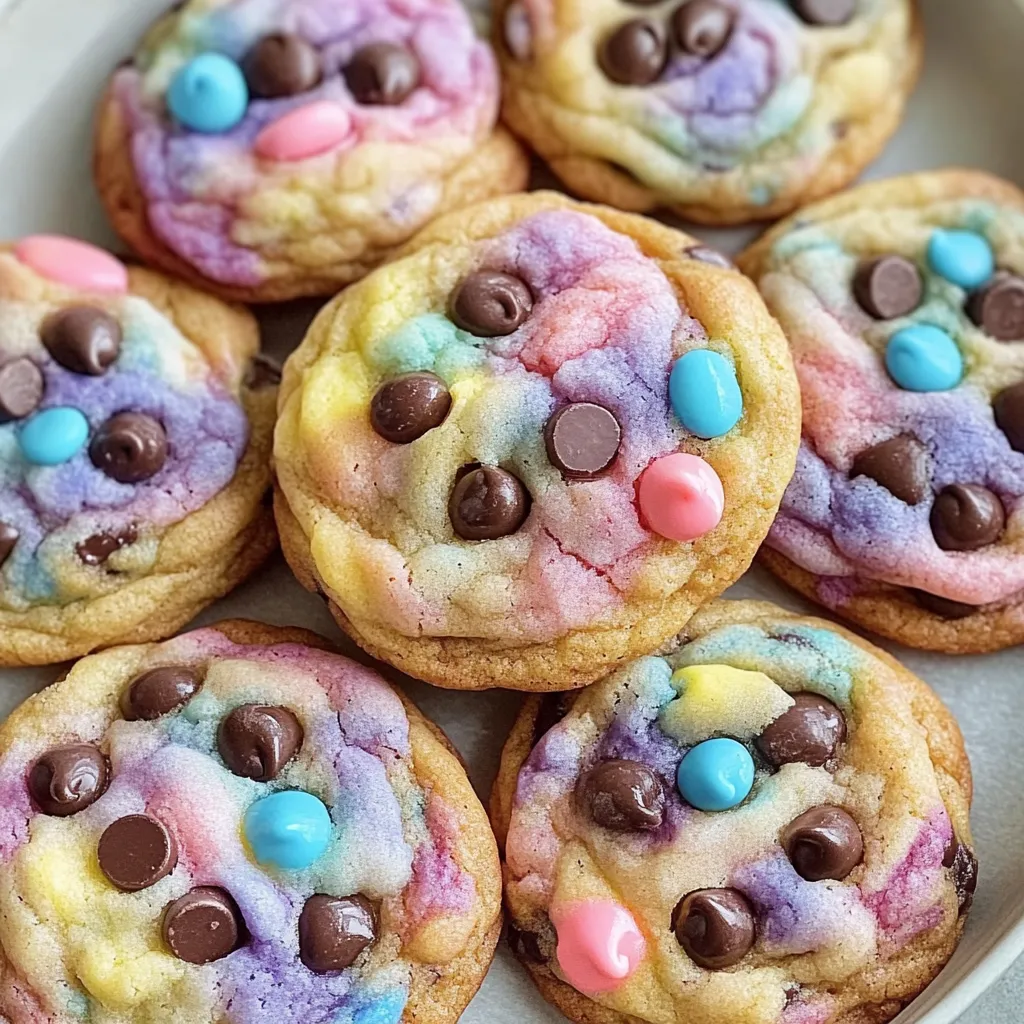
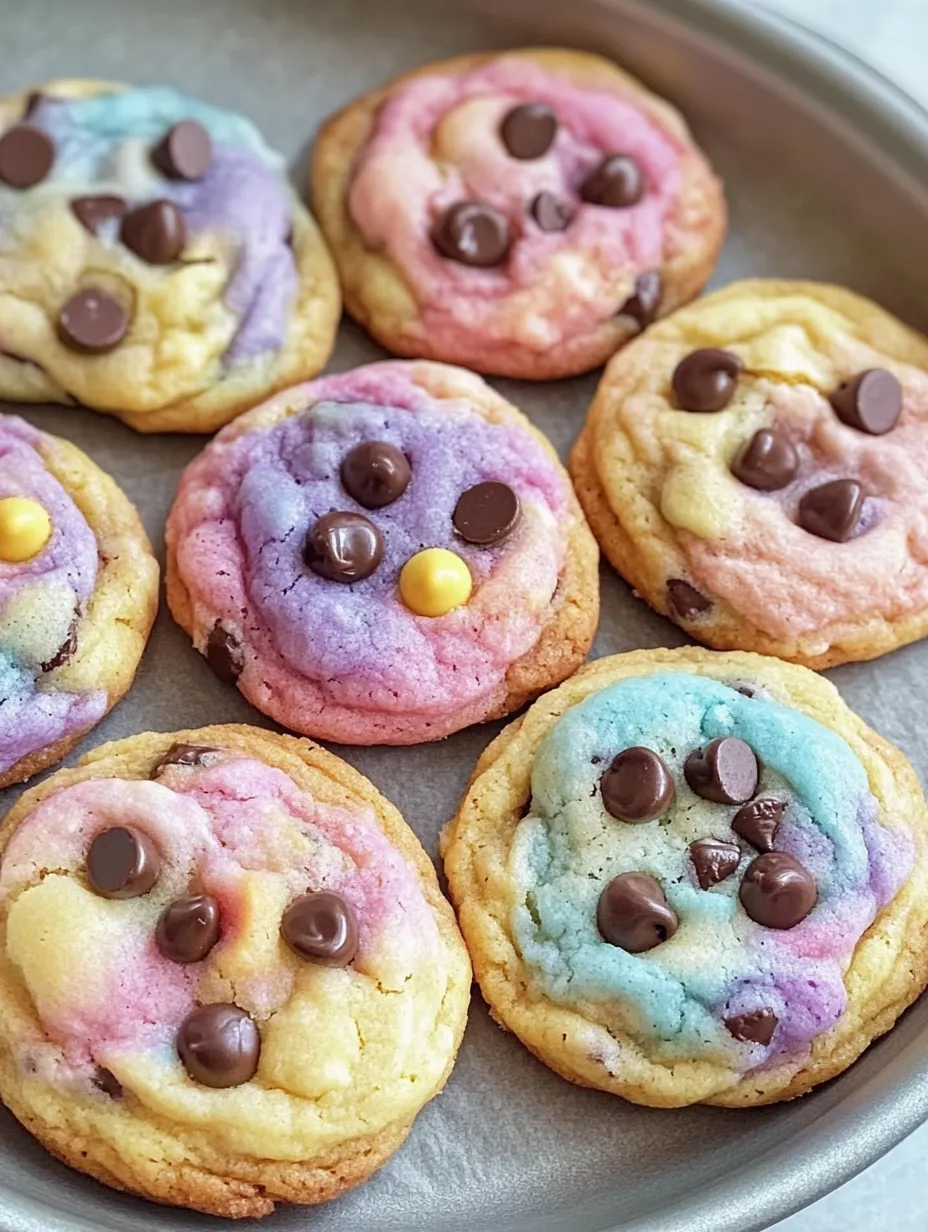
- Stick with gel colors for these cookies since liquid ones add unwanted moisture. I split my dough into four equal parts using a scale, then carefully add tiny amounts of color with a toothpick, working it in until I get soft pastel shades. For Easter vibes, I go with light pink, purple, yellow, and blue, but you can match any theme you want. Just keep the colors gentle and springy rather than too bright.
- Marbling Technique
- Here's where it gets fun, and you really can't mess it up. Take small chunks of each colored dough (roughly a tablespoon each), press them together loosely, and give them just a quick twist or two to create swirls without fully mixing the colors. Don't handle it too much or you'll lose those distinct color patterns. Every cookie turns out different, which my kids think is the best part about making them.
- Baking Precision
- Watch these closely since they cook faster than regular cookies due to all the handling of the dough. I start peeking at 9 minutes, though mine usually need 10-12 minutes in my oven. They're ready when just the edges look set and slightly golden, while the middles still seem a bit soft—they'll finish cooking from the heat of the pan after you take them out. If you wait until they look done all over, they'll end up too crispy.
- Cooling Process
- Let them sit on the hot baking sheet for 5 minutes so they can firm up enough to move without breaking. They'll be super soft right out of the oven, which leads to that perfect chewy texture once cooled. Moving them to a wire rack after the initial rest keeps the bottoms from getting soggy. I've noticed these actually taste better the day after baking when the flavors have had time to come together.
My partner usually skips over any "fancy" cookies and goes straight for plain chocolate chip, but he actually thinks these taste better than the original. The marbling somehow creates different zones of chocolate intensity throughout each cookie. Something about the mix of colors and varying chocolate bits turns an ordinary snack into something that feels extra special.
Delightful Companions
These colorful treats go great with milk served in pastel cups for extra Easter flair. When hosting a spring gathering, try arranging them on a plate with some fresh strawberries and blueberries for a pretty dessert spread. You can also tuck them into Easter baskets with other goodies for a personal touch. My children love munching on them after school during spring, and I enjoy them with my afternoon coffee or tea.
Fresh Twists
Consider swapping in white chocolate chips or pastel candy-coated chocolates for more spring charm. A splash of almond extract along with the vanilla gives them a fancier flavor profile. Toss in some colorful sprinkles with the chocolate chips for a birthday cake vibe. Last Easter, I tried something different by keeping half the dough plain and marbling just a portion with one or two colors, then putting them together for a more subtle but equally pretty result.
 Save
Save
I've baked these Easter chocolate chip cookies for everything from school parties to family get-togethers, and they always get people excited. There's just something wonderful about how those pastel colors twist together, making snacks that look as good as they taste. My little girl now asks for them year-round for her playdates and parties, saying we can just switch up the colors to match whatever we're celebrating. I've learned that the most memorable treats are often just familiar favorites with a creative spin that makes them feel fresh and exciting.
Recipe FAQs
- → What’s the best type of food coloring to use?
- Gel food coloring works great since it keeps the dough vibrant without messing up the texture. Liquid dye works in a pinch but might need extra flour. Powder is tricky to mix evenly, so it’s less ideal.
- → Can I prep these cookies ahead of time?
- Definitely. You can keep the dough in the fridge for up to three days or freeze shaped dough balls for as long as three months. Bake them straight from frozen if needed; just allow an extra minute or two in the oven.
- → How can I get vibrant marble swirls?
- Don’t overwork the dough when combining the colors—press the different shades together gently. Cool the dough briefly in the fridge if the colors start blending together too much.
- → Are there other mix-ins besides chocolate chips?
- Sure! White chocolate chips pair nicely or try Easter M&Ms, pastel sprinkles, or chopped mini chocolate eggs. You could mix a combination of these for extra fun.
- → How can I keep these cookies as soft as day one?
- Keep them in an airtight container with a slice of bread inside to hold moisture. Stash them at room temperature for up to five days or freeze for three months. Thaw frozen ones before eating.