
 Save
Save
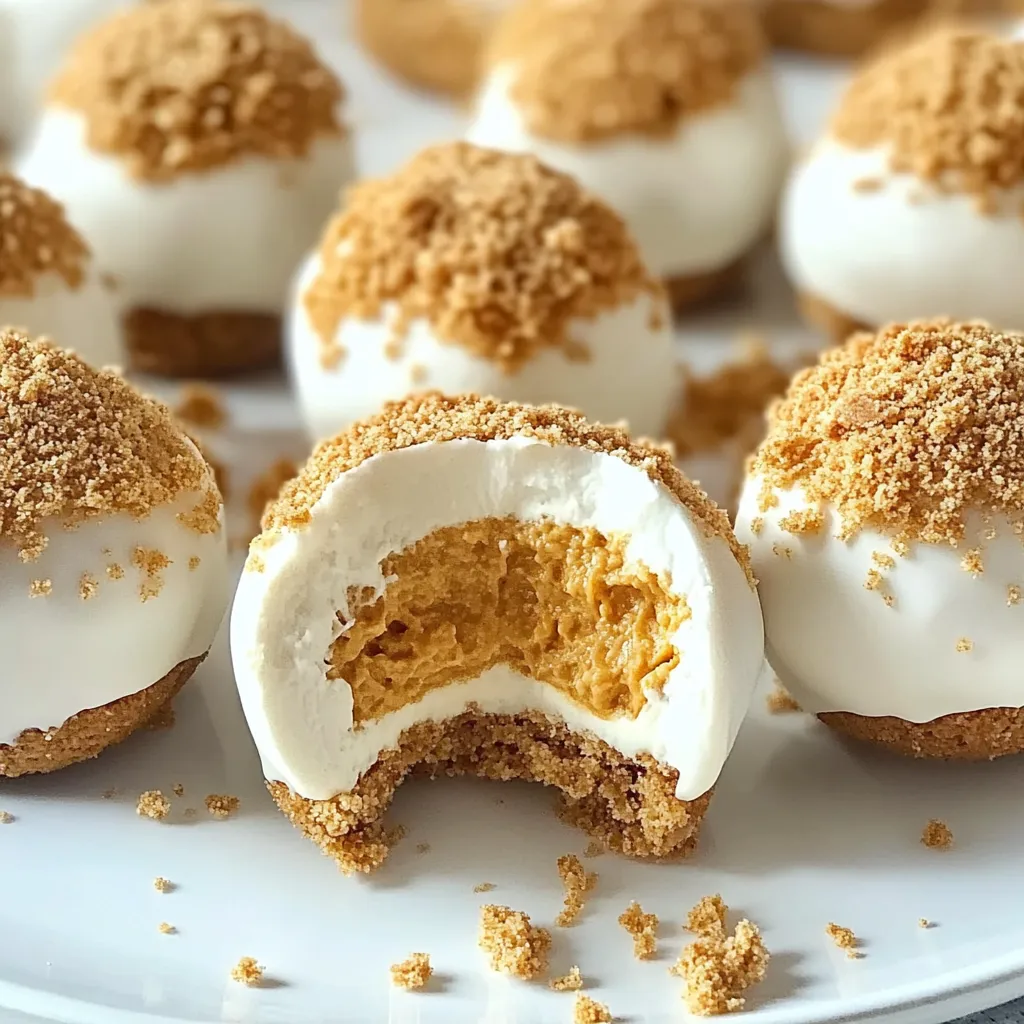
Pumpkin cheesecake bites you don’t need to bake bring together creamy cheese, real pumpkin, and cozy fall spices for a super easy, handheld treat. You get those classic autumn tastes in little portions, no oven or tricky steps needed.
I made a batch of these last Sunday for family. Everyone raved, but my niece was especially smitten, crunching away and telling me they’re “way better than the regular kind.” Mixing creamy filling with graham cracker crunch totally won them over.
Irresistible Key Ingredients
- Full-fat cream cheese: Go for a big-name brand like Philadelphia—sticks together best and keeps things smooth
- Pure pumpkin puree: Deep orange color and a thick texture mean richer flavor, so skip any watery cans
- Honey graham crackers: Pick a honey-flavored option for a sweet, balanced taste
- Pumpkin pie spice: Crack open a new jar if you can—the flavors really pop when fresh
- Real vanilla extract: Skip imitation stuff for that rich, real vanilla punch
Step-by-Step Directions
- Final chill:
- Let them sit on a parchment-lined tray in the fridge one more hour to firm up before you dig in
- Shape and coat:
- Scoop the chilled mix with a small scoop, roll in your hands till round. Work with a few at a time so they stay cold and easy to handle
- Initial chill:
- Put the filled bowl in your fridge for at least a couple hours. This helps the flavors come together and the mix tighten up
- Incorporate dry ingredients:
- Add in your crushed graham crackers a bit at a time. Stop when the mixture holds its shape but isn’t dry
- Combine wet ingredients:
- Slowly mix in pumpkin puree while stirring, then sprinkle in spices and pour in vanilla, blending it all together smooth
- Beat cream cheese thoroughly:
- Start with cream cheese at room temp and beat for several minutes till super creamy. Scrape the bowl with a spatula to catch any lumps
 Save
Save
My grandma always told me pumpkin treats taste better if you’re patient. She’s right—by the next day, everything blends together for the richest filling.
Chill and Serve
If you want them to look extra fancy, pile them on a layered tray, maybe with some sage leaves or cinnamon sticks here and there. Thanks to plenty of cream cheese, these bites hold up for two hours at room temp just fine.
Perfect Texture Every Time
Keeping everything cool is your not-so-secret weapon for smooth balls. Work in small sets and give the mix a chill between rounds—it makes for the creamiest, best-looking treats.
Plan Ahead Like a Pro
Super handy for full schedules, you can prep the mix up to two days before rolling. Finished balls even freeze up to a month—just slide them in the fridge overnight to thaw before sharing.
Fun Flavor Twists
This method is a blank canvas. For winter, I throw in crushed peppermint and dunk in dark chocolate. When spring rolls around, toasted coconut on the outside makes them a hit at picnics.
Chef’s Go-To Tricks
- For a deeper fall feel, roll ‘em in gingersnap crumbs mixed with a dusting of cinnamon
- If you want a chocolate coat, pop the shaped balls in the freezer 15 minutes first—it stops the chocolate from slipping off
- Drag a fork over the still-wet chocolate for cute lines and patterns
 Save
Save
Making these on repeat every fall, I’d say they’re the most fun and versatile autumn sweet I have. Pumpkin, cream cheese, and spices just work together—great for snacking or finishing a fancy meal.
Recipe FAQs
- → Can these be prepared early?
- Absolutely! Make them 2-3 days in advance and refrigerate, or freeze for a month.
- → What if my dough is too soft?
- Chill it for at least 2 hours to stiffen. Still runny? Add more crumbs or give it extra fridge time.
- → Can I swap pureed pumpkin?
- Avoid pumpkin pie filling since it’s sweetened and spiced—it’ll alter the flavor and consistency.
- → How do I coat them easily?
- Use a fork to dip the balls in melted almond bark, shake off any leftovers, then set them on parchment to harden.
- → What’s the best way to store them?
- Keep them in a sealed container in the fridge for 3 days, or in the freezer for up to 30 days.