
 Save
Save
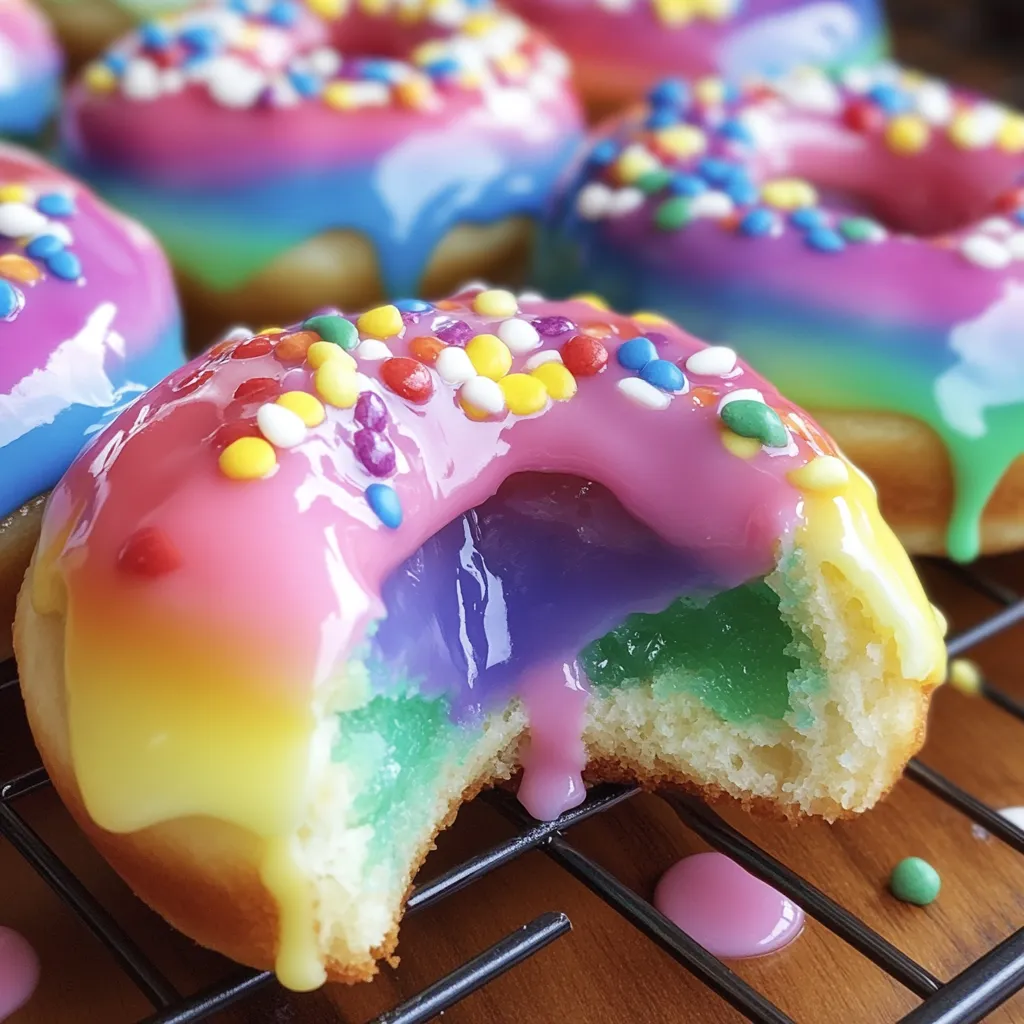
Taking a bite of a tender, just-glazed doughnut and finding a colorful rainbow swirl tucked inside? It's pure joy. I came up with this fun idea during a wet weekend morning when my kids were scrolling Instagram and begged for something "totally awesome" to make. These color-packed doughnuts mix the warm comfort of homemade fried treats with a playful surprise that turns breakfast into something special. They've become our go-to celebration food, showing up for birthdays, good grades, and those random weekends when we all need a splash of happiness.
A few weeks back I whipped these up for my daughter's friends staying over, and one girl called them "the coolest breakfast anyone ever made." Her mom messaged me later asking how to make them, saying her daughter talked about them nonstop on the way home. That's what I love about rainbow surprises – they turn everyday food into something magical.
Delightful Donut Basics
- Active dry yeast: Good doughnuts start with properly bubbling yeast. Don't skip that first 10-minute wait; if your yeast doesn't get foamy, it's too old and your doughnuts will stay flat. I found this out when I tried to cut corners once.
- Room temperature butter: Not melted, definitely not cold – it needs to be truly soft for smooth mixing without leaving fatty spots. Half the time I forget to take it out early, so I end up carrying the butter in my pocket while getting everything else ready!
- All-purpose flour: Gives you the right mix of strength and softness. I've tried fancy bread flour (made them too tough) and cake flour (made them fall apart), but regular all-purpose flour makes that classic doughnut feel we love.
- Vanilla pudding: Your blank canvas for rainbow art. Homemade tastes smoother, but I often use instant pudding mix when I'm rushed, and they still turn out great. Just make sure it's fully set before adding colors.
- Canola oil: Works best because it doesn't have a strong taste and can handle high heat. Vegetable oil is okay too, but don't use olive or coconut oil unless you want your doughnuts tasting like those.
 Save
Save
Wonderful Donut Techniques
- Getting dough just right:
- Add your flour bit by bit instead of dumping it all in. This helps you nail that smooth, slightly sticky feel that makes super fluffy doughnuts. The dough should come away from the bowl sides but feel a little tacky when touched. Too dry and you'll end up with heavy doughnuts.
- First rise matters:
- Don't rush that hour-long first rise as it builds both flavor and texture. I put my covered bowl in a slightly warm oven (turned on low then off) to create the perfect spot. You'll know it's ready when the dough clearly doubles in size. In cold kitchens, you might need to wait a bit longer.
- Smart cutting:
- A 3-inch round cutter works great for regular-sized doughnuts. A drinking glass does the job if you don't have cutters. Press straight down without twisting, as twisting can seal edges and block rising. I always fry the cut-out centers too for little bonus treats!
- Frying tricks:
- Keeping oil at 350°F is super important. Too hot and they'll look done outside while still raw inside, too cool and they'll soak up oil and get greasy. Use a thermometer if you can, or test with a tiny dough piece that should bubble right away and float up.
- Rainbow magic:
- Split your vanilla pudding into 5-6 small bowls and add bright colors to each. When filling your piping bag, carefully put each color in stripes along the sides rather than stirring them together. This creates that wow-factor swirl when you squeeze it into doughnuts.
- Filling know-how:
- Let doughnuts cool just enough to handle, about 10 minutes. Make a small hole in the side with a knife, then pipe in rainbow pudding until you feel it pushing back. I sometimes fill them extra so a tiny bit of rainbow peeks out.
My first try making these was pretty funny. I rushed the second rising time and ended up with heavy doughnuts soaked in oil. Then I tried filling them while they were too hot, making the pudding melt and drip everywhere. After many test batches (my family was happy to be taste-testers), I've learned that taking your time at each step makes all the difference. Now even my not-quite-perfect batches get gobbled up in minutes.
Eye-Catching Serving Ideas
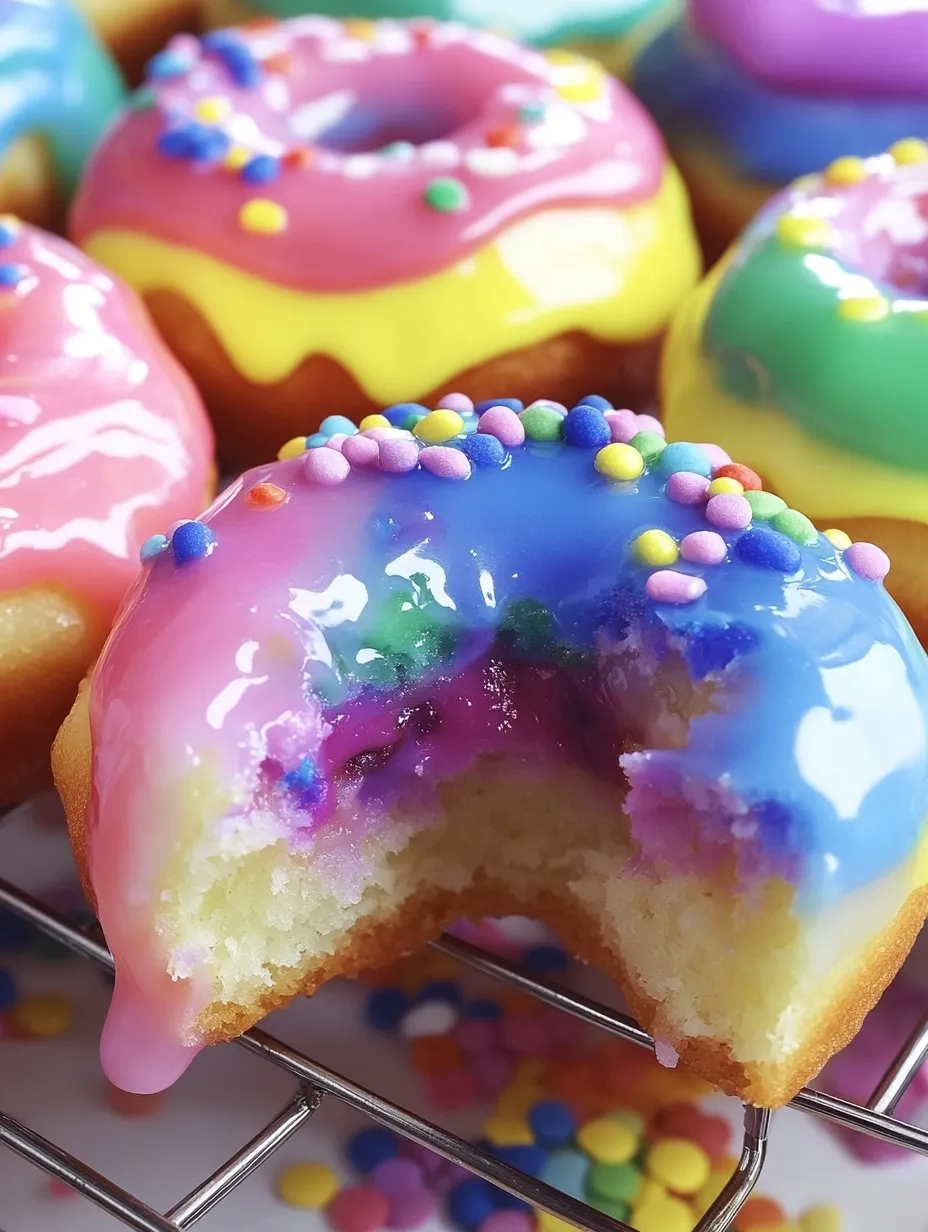
Make these rainbow doughnuts look even more stunning by putting them on a white plate with fresh berries scattered around for a pop of color. On birthday mornings, I set them on a cake stand with a candle stuck in the middle one. They're also great for brunch parties. Just cut a few in half and place them cut-side up to show off the rainbow inside, which makes everyone want to grab one.
Tasty Twist Options
After you get comfortable with the basic method, try adding a teaspoon of cinnamon or nutmeg to the dough for extra flavor. Chocolate fans will love using chocolate pudding as your base and coloring it in shades from white to dark brown for a cool gradient look. During holidays, match your color scheme to the season. Think red and green swirls for Christmas, soft pastels for Easter, or orange and black for Halloween. You can try so many different things!
Keeping Them Fresh
These doughnuts taste best on the day you make them, really within the first few hours. If you need to keep them, store in a single layer in an airtight container at room temp for up to a day. Don't put filled doughnuts in the fridge as the moisture ruins the dough texture. If you want to save time, make the dough the night before and let it rise in the fridge overnight, then shape and do the second rise in the morning.
 Save
Save
I've baked these colorful surprise doughnuts for so many special mornings at our house, from birthday breakfasts to first school days. There's something totally magical about watching someone bite into what looks like a regular glazed doughnut only to find a rainbow of colors inside. That look of happy surprise makes all the work worthwhile. While they take more effort than grabbing a box from the store, the fun memories we make around our table as we enjoy these colorful treats together are absolutely worth it.
Recipe FAQs
- → Can I make these doughnuts in the oven instead of frying?
- Sure! Bake them at 350°F for about 15 minutes. They won’t be as fluffy as fried ones—they’ll feel a bit more like bread—but they’ll still be tasty.
- → How should I keep these doughnuts fresh?
- Pop them in a sealed container on the counter for up to 2 days. If you need to keep them longer, store them in the fridge because of the pudding.
- → Can I swap in instant pudding for the filling?
- Go for it! Instant pudding works perfectly. Just follow the directions on the box, split it up, mix in different food coloring, and layer it into your piping bag.
- → What’s the trick to adding the filling?
- A piping bag with a long nozzle works best. Stick the tip into the doughnut’s side, then gently squeeze to add the pudding. You’ll notice the doughnut get heavier as it fills.
- → Can I prep the dough ahead of time?
- Yes, you can let it rise overnight in the fridge. Before shaping the doughnuts, let it warm up to room temp first!