
 Save
Save
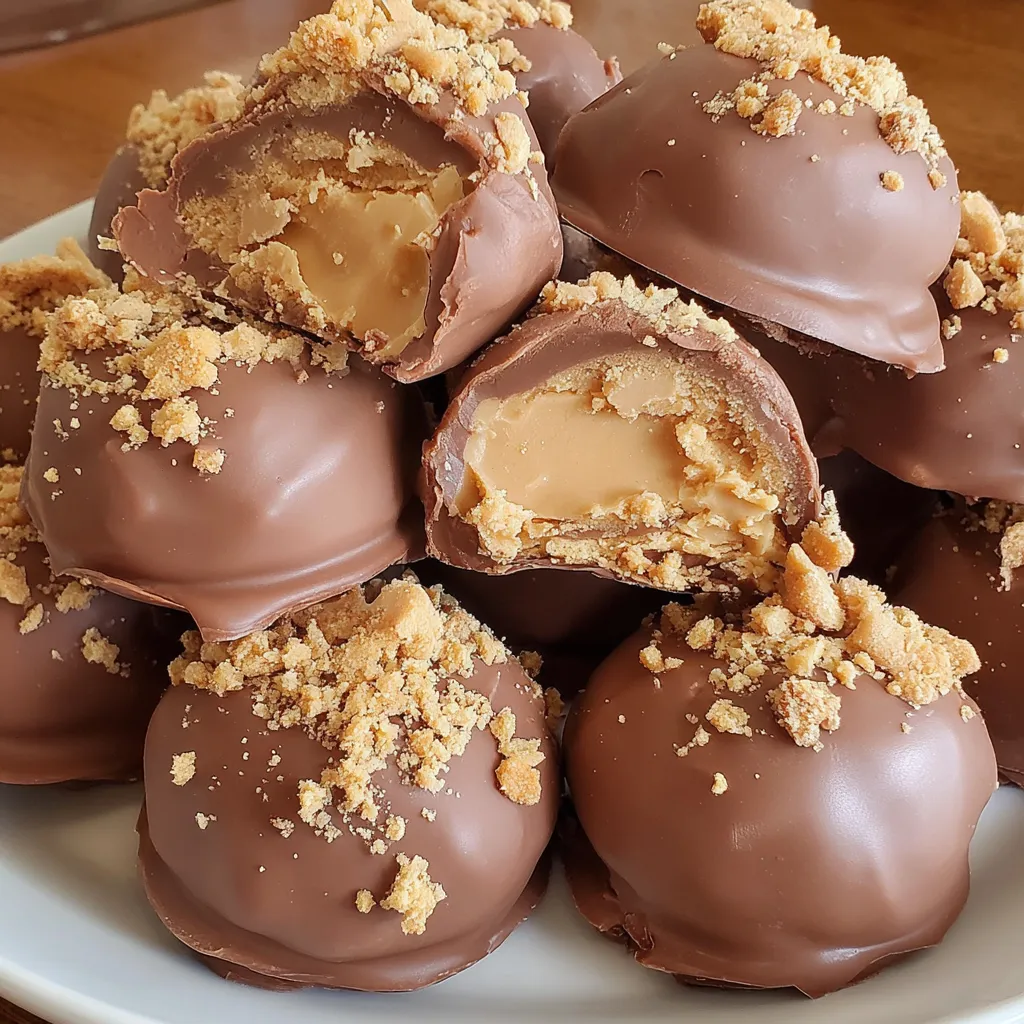
From the very first bite these Butterfinger Balls deliver that perfect mix of creamy peanut butter with a crunchy surprise inside all enveloped in a silky chocolate shell. Every year at our family’s holiday gathering these never make it past the dessert table and neighbors have started calling to ask if I am making them again. If you want a dessert that is both easy and downright irresistible this is it.
The first time I made these was on a whim for a friend’s party but soon everyone requested them for every potluck or movie night. They really are crowd pleasers.
Ingredients
- Creamy peanut butter: Choose a smooth mainstream brand for best texture and to prevent separation
- Softened butter: This brings richness and helps everything blend smoothly Use unsalted for fresher taste
- Powdered sugar: Sweetens and tightens the dough making it easy to form into balls Sift if lumpy
- Crushed Butterfinger bars: Provides that signature crispy toffee flavor Crush them just before using for maximum crunch
- Graham cracker crumbs: Add texture and structure to the base Use fresh crackers for the most distinct flavor
- Vanilla extract: Adds a subtle warmth Look for pure vanilla for the best aroma
- Chocolate bark or chips: The chocolate coating that turns these into candy Choose high quality melting chocolate for the smoothest finish
- Optional toppings: Extra crushed Butterfinger sprinkles or flaky sea salt let you personalize each batch
Step-by-Step Instructions
- Make the Dough:
- In a large mixing bowl blend peanut butter and softened butter with an electric mixer on medium speed until the combination turns completely creamy and soft without streaks or lumps
- Incorporate Vanilla:
- Add the vanilla extract and mix thoroughly so every bit of dough gets that touch of aroma
- Mix in Sugar:
- Gradually add powdered sugar in several additions while mixing on low Scrape the sides often to ensure an even mix that’s not overly sweet in one spot
- Add Crunch:
- Gently fold in graham cracker crumbs and crushed Butterfinger bars using a spatula to keep everything from breaking down too finely
- Shape into Balls:
- Line a baking sheet with parchment paper Scoop dough by tablespoons and roll between your hands into smooth uniform balls Place each on the prepared sheet
- Chill the Balls:
- Put the tray in the freezer and let firm up for about 30 minutes so they hold their shape when dipped
- Melt the Chocolate:
- When balls are cold melt chocolate bark or chips in a microwave safe bowl using short 30 second bursts at half power Stir well each time and stop before it is completely melted to avoid burning Residual heat melts the last lumps
- Dip and Decorate:
- Use two forks to lift a chilled ball into the melted chocolate turning gently to coat Tap off extra chocolate and return to parchment paper Decorate right away with extra Butterfinger or sprinkles
- Set and Enjoy:
- Let the chocolate solidify at room temperature or in the fridge These are ready to enjoy once the shell turns firm and glossy
 Save
Save
You Must Know
- Gluten free option possible with gluten free graham crackers
- Easy to double or halve depending on your crowd size
- Holds up well in the freezer for make ahead treats
What I love most about this recipe is the Butterfinger bits which add such a unique crunchy caramel flavor to every bite The first time my little niece tasted one she immediately asked for another and her big chocolate grin is now one of my favorite family memories
 Save
Save
Storage Tips
Once the chocolate shells are set store Butterfinger Balls in an airtight container either at room temperature for up to three days or in the fridge for a week They also freeze beautifully so you can stash a batch for last minute gatherings just let them thaw at room temp before serving
Ingredient Substitutions
If you need to avoid peanuts try using sunflower seed butter or almond butter instead And for the chocolate any good quality melting chocolate works dark or milk both are delicious Just remember to check the texture of your substitute to make sure the dough sticks together
Serving Suggestions
Pile them high on a holiday tray sprinkle with festive colored sugar or sea salt or package a few in a cellophane bag as a sweet homemade gift They are perfect with coffee at brunch a late night dessert bite or even as a fun party favor
Cultural and Historical Context
Butterfinger candy bars have that classic American history dating back to the 1920s and using them in baking has become a kitchen tradition My family first started making Butterfinger Balls when we were looking to repurpose leftover Halloween candy and now it is a holiday staple each year
Recipe FAQs
- → How do I keep the mixture from sticking to my hands while rolling?
Lightly coat your palms with a touch of butter or line your hands with a bit of powdered sugar to prevent sticking as you shape the balls.
- → Is it necessary to chill the dough before dipping in chocolate?
Chilling firms up the peanut butter mixture, ensuring the balls retain their shape and dip smoothly into the melted chocolate without crumbling.
- → Can a different type of chocolate be used for coating?
Absolutely! Dark, milk, or white chocolate all pair deliciously. Choose your favorite or mix for variety and visual flair.
- → How should these be stored after making?
Keep them in an airtight container in the refrigerator for optimal freshness and firm texture. They hold well for several days.
- → Can I substitute another candy bar for Butterfinger?
You may swap in other crunchy candy bars for unique flavor twists, though Butterfinger brings a distinctive, memorable taste and texture.
- → Are natural peanut butters suitable for this dessert?
It’s best to use traditional, not all-natural, peanut butter to achieve the right consistency and help the mixture hold together well.