
 Save
Save
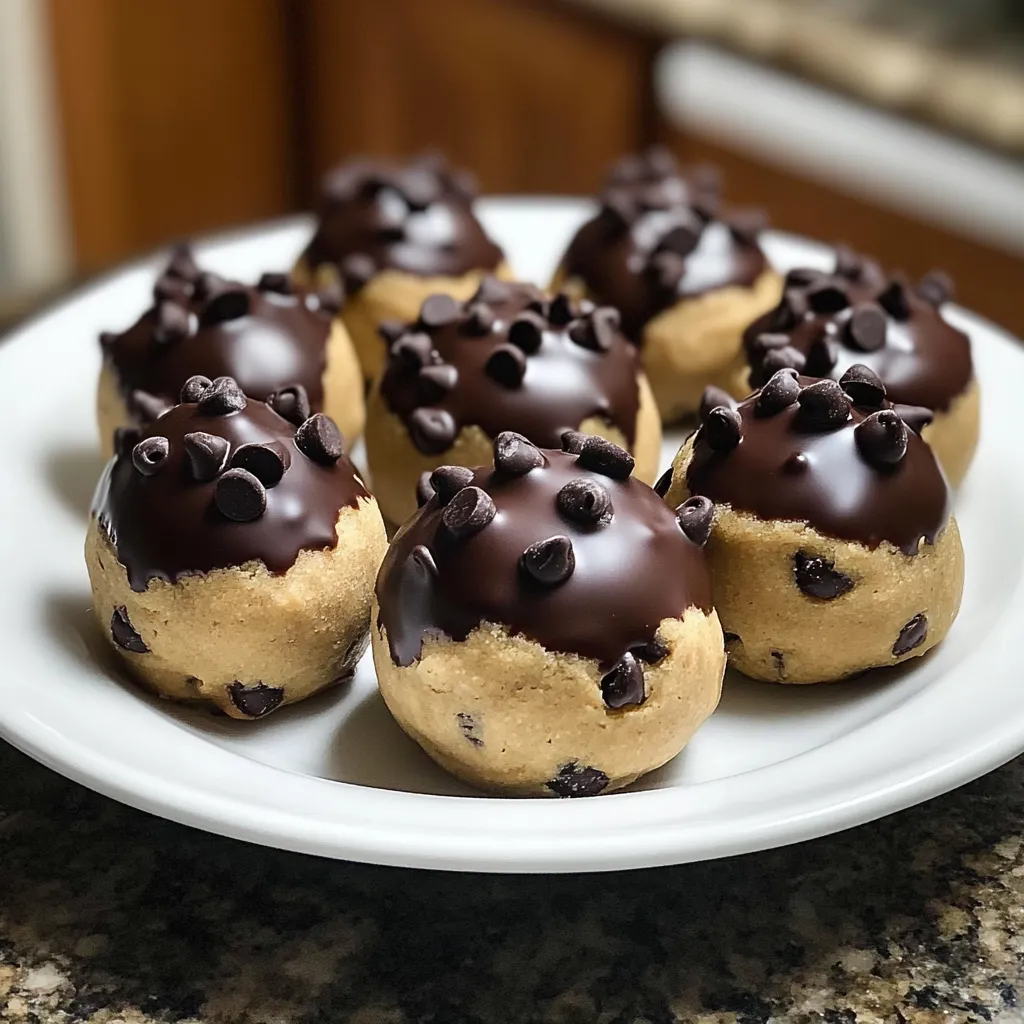
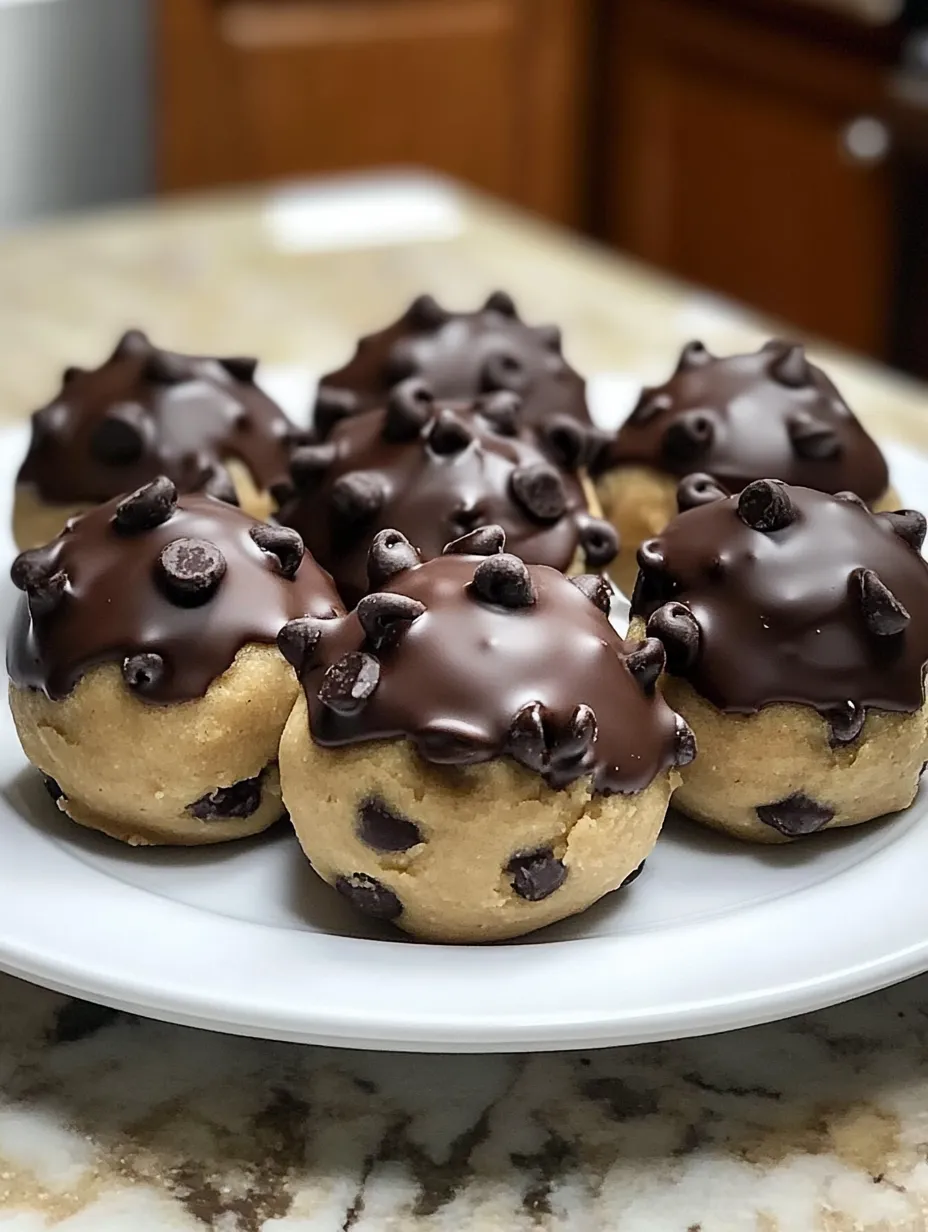
Sneaking cookie dough from the mixing bowl is something I've always done on the sly. These chocolate-dipped morsels give you that same forbidden taste without worrying about raw eggs. I came up with this idea after getting caught red-handed stealing dough while baking cookies with my children. The creamy, chip-filled centers covered in that crisp chocolate shell have now become what I'm known for at every social event.
When I took these to my sister's new place celebration last year, her next-door neighbor who kept saying he was "cutting back on sweets" gobbled up seven before we even started eating dinner. I later spotted him quietly asking my sister if any were left. That's just what happens when people try these little treats.
Must-Have Ingredients
- Unsalted butter: It should be soft but still hold its shape. Your mixture's texture won't turn out right if your butter's too hard or melted.
- Brown sugar: This gives that sweet, molasses-like taste that makes cookie dough so tempting. Press it down tight when measuring for best results.
- Heat-treated flour: Plain flour might contain harmful bacteria, so we pop it in the oven at 350°F for 5 minutes to make it edible. Let it cool all the way before you use it.
- Chocolate chips: You'll need two varieties: some stirred into your dough for extra yumminess, and higher-quality ones for melting and coating.
- Coconut oil: Just add a small spoonful to your melted chocolate and you'll get that shiny finish that breaks with a crack.
 Save
Save
Creating Delicious Treats
- Start with basics:
- Beat butter and brown sugar till it's really airy and lighter in color – about 3 minutes using electric beaters. Don't try to speed through this part, it's what makes these so good. Mix in vanilla and salt until they're fully blended in.
- Build your dough:
- Slowly add your cooled, oven-treated flour while mixing on low. At first it'll look all crumbly. Add milk bit by bit until everything sticks together but isn't wet. Stir in chocolate chips by hand with a rubber spatula.
- Form your bites:
- Roll small chunks between your hands to make one-inch balls. If it's sticking to your fingers, put the dough in the fridge for 15 minutes. Put all your balls on a parchment-covered tray and chill them for half an hour until they're firm.
- Get your chocolate ready:
- Melt your dipping chocolate carefully in short 20-second bursts, stirring after each time. Add your coconut oil so it flows better. Stop microwaving when most chips are melted and let the remaining heat do the rest.
- Dunk them right:
- Take out just a few dough balls at a time (keeping others cold), and dip each halfway into your melted chocolate. Let extra chocolate drip off, then place back on your lined tray. If you want sprinkles, add them right away before the coating hardens.
My first try making these was a total mess. I didn't wait for the dough to chill and tried dipping warm balls, ending up with chocolate all over my hands and weirdly shaped lumps. Now I keep most of them in the fridge while I work with just a few, and they look good enough to post pictures of online.
Tasty Combinations
When I'm hosting friends, I put these in bright little paper cups on a wooden serving plate. They're also amazing chopped up and scattered over ice cream with some caramel sauce drizzled on top. For my kids' birthday parties, I've pushed sticks into them to make cookie dough lollipops that vanish almost instantly.
Fun Variations
You can switch things up so many ways with this basic recipe. Try using peanut butter or butterscotch chips instead of chocolate ones. Throw in some mini M&Ms for extra pop and crunch. Covering them in white chocolate with colorful sprinkles makes a funfetti version that children absolutely love. My own favorite adds bits of toffee to the dough and a sprinkle of sea salt over the chocolate coating.
Storage Tips
These goodies stay fresh in a sealed container in your fridge for about a week. Put parchment paper between layers so they don't stick together. If you want to keep them longer, freeze them on a baking sheet until solid, then put them in a container. Just move them to the fridge to thaw before you serve them.
 Save
Save
I've brought these cookie dough bites to everything from fundraisers at my kids' school to Christmas get-togethers. There's just something about that mix of soft dough inside and crisp chocolate outside that nobody can turn down. While I do enjoy tackling complicated desserts sometimes, it feels pretty great making something this tasty with so little work. Just don't tell anyone how quick they were to make – let them think you slaved away for hours in the kitchen.
Recipe FAQs
- → What’s the reason for heating the flour?
- It helps get rid of bacteria, so it’s safe for raw recipes. Toss it in the oven at 350°F for 5 minutes and let it cool.
- → Is there a vegan version?
- Yep! Swap regular butter for a plant-based one, use non-dairy milk, and find vegan chocolate chips.
- → How long can I keep these bites?
- Pop them in an airtight container in the fridge, and they’ll last about a week.
- → Are they freezable?
- Totally! They stay fine frozen for 3 months. Just let them thaw in the fridge before eating.
- → Can I leave out the coconut oil in the coating?
- Sure, but the oil helps the chocolate melt better and look shinier. You could try shortening too.