
 Save
Save
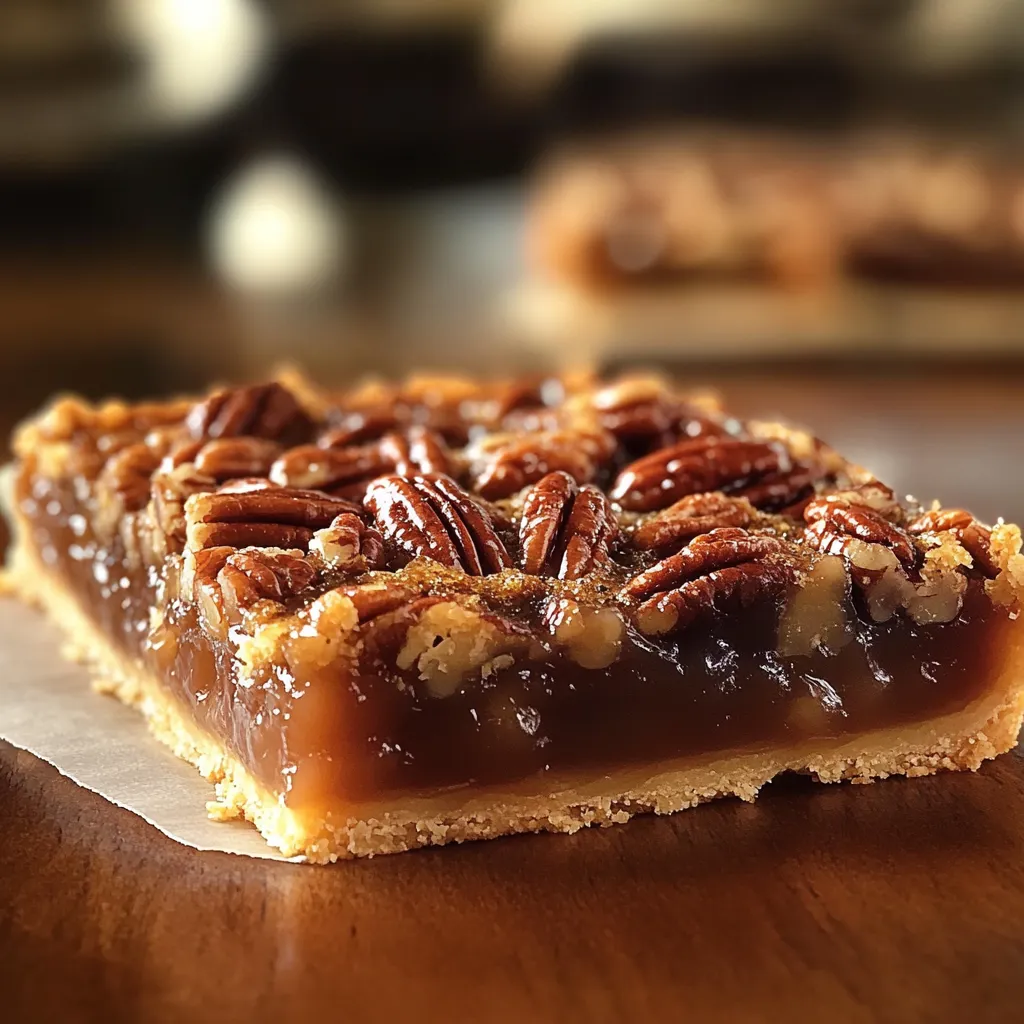
Pulled these bars out of the oven last weekend and bam—suddenly I'm back in my grandma's sunny kitchen. That sweet, nutty smell mixing with caramel always gets me. After years of struggling with pecan pie, I finally figured out the secret and turned it into bars. If you're scrambling for time but still want homemade vibes, these are the ones that'll change how you bake.
The first batch was actually a fluke. I meant to bring individual little pies to my sister’s dinner but ran short on time. Ended up with these bars instead, and now everyone asks for them over pie!
Delicious Ingredients Inside
- Pecan halves: Go for top-shelf ones for the best crunch
- Pure vanilla extract: Only the genuine stuff makes it shine
- Fresh eggs: Make sure they're not too cold so the filling comes out dreamy
- Real butter, unsalted: Margarine isn't the vibe here
- Dark brown sugar: Gives depth and a rich color
- Light corn syrup: Stick with light kind for the right texture
- Refrigerated pie crusts: Grab the kind that tastes like homemade without the work
 Save
Save
Time to Create Awesomeness
- Golden Glory:
- Wait for that beautiful, perfect golden finish in the oven
- Perfect Pour:
- Go ahead and pour the filling right over your rolled out base
- Pecan Dreams:
- Tumble your pecans in the sugary, buttery mix
- Sweet Beginnings:
- Blend the filling until glossy and dreamy
- Base Creation:
- Roll out your crust nice and evenly, just like smoothing out linen
Secrets to That Dreamy Bite
It took me a ton of tries to get that gooey-not-soupy texture down. A couple total flops later, it finally came together—rich without being heavy. The trick? Let the melted butter cool for a few minutes before it joins the rest. I measure everything else out while I wait those precious five minutes.
First time I did Thanksgiving, I tried to hurry things up. Bad idea—the bars were a sloppy mess. Patience is the move. Let them chill completely, even if the smell is torture.
Stories and Handy Hints
Got a tip from my mother-in-law—setting the pan on a wire rack by the open window cools them fast and perfect. Hide the pan from your neighbors, though, or you might not have leftovers. My neighbor Jane loves a splash of bourbon in hers. I tried it for the holidays and, well, the adults cleaned out the tray!
Ways to Make It Pop
I like to shake things up sometimes—toss in some dark chocolate here and there, or throw a little flaky sea salt on top. Last time I added orange zest to the mix and my guy said he’d never tasted better.
The Fun of Serving
For fancy get-togethers I pull out my grandma’s old silver platter. Friends coming over? These look cool stacked up on a wooden board with fresh mint from the yard. Honestly, though—they’re just as tasty snatched from the container at midnight (ask me how I know).
 Save
Save
Stay Fresh, Stay Tasty
Pop these in an airtight container to keep them happy. If you're stacking, put parchment in between. Around here, they vanish so fast that leftovers are rare. They'll last a few days at room temp. Good luck keeping them that long!
The best thing? They’re pretty forgiving. I’ve missed vanilla or left them in the oven too long and nobody ever notices. My kid says they taste better than any store version, and that’s the best compliment this mom can get.
Your Questions, Answered
- "Why did my filling go weird?"
- Usually either your eggs were chilly or the butter was nuclear-hot. Done that myself!
- "Instead of corn syrup… maple syrup?"
- You can use it, just expect the flavor to be different. My friends up north love it this way.
- "My base turned mushy! What's up?"
- Try baking the crust on its own for about ten minutes before the filling goes in. Works like a charm.
I always feel a little nostalgic baking these. Dishes like this are more than instructions—they turn into the best memories. No matter the reason or day, I hope they make your kitchen as happy as mine.
And remember, baking is about having fun. If you mess up, there’s always a next round. You’ll want to make these again anyway!
Wishing you lots of good times and warm treats from my home to yours!