
 Save
Save
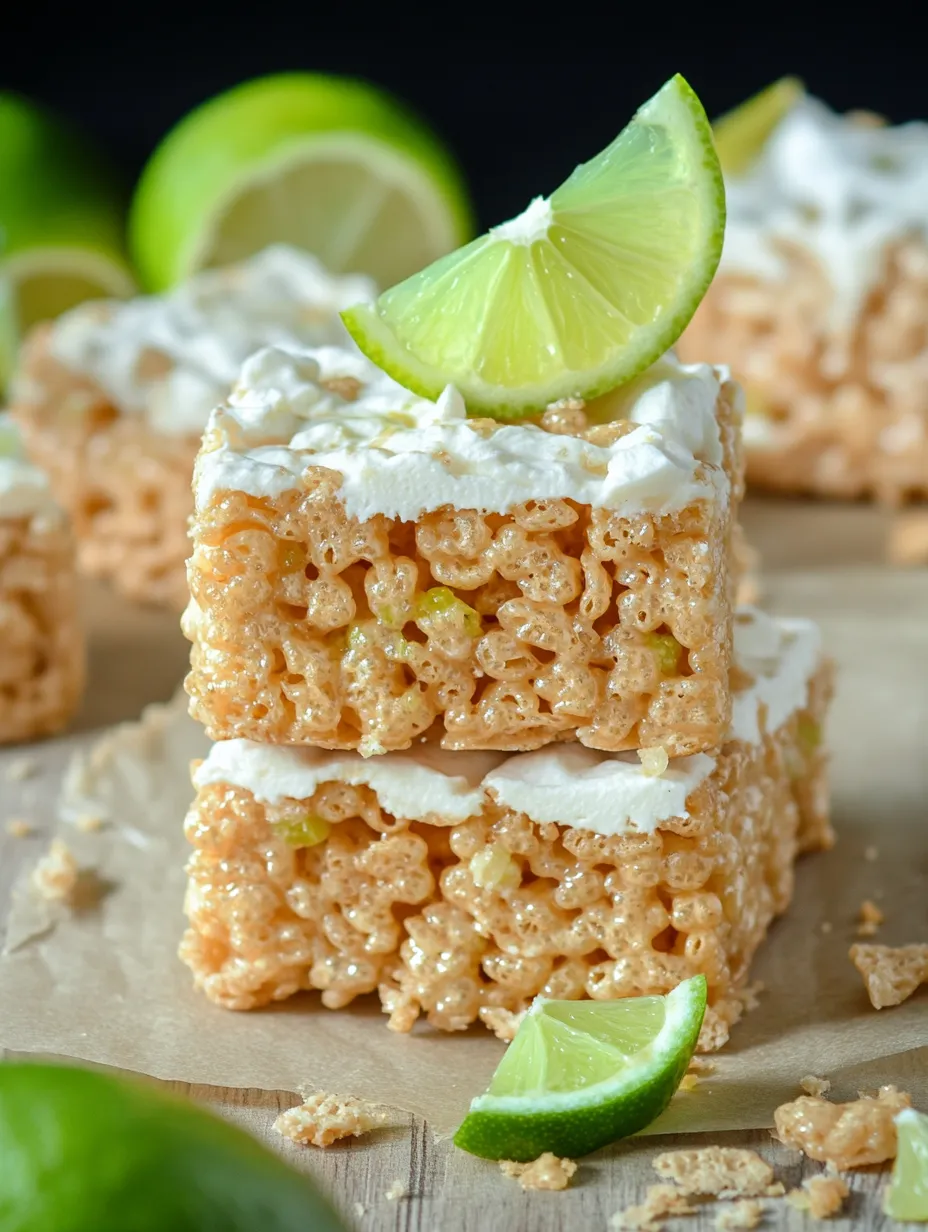
I discovered this key lime pie rice krispie creation last year when I needed something fresh for a block party. The mix of zesty lime with gooey marshmallows makes these amazing treats that remind you of key lime pie but keep that crunchy rice krispie feel. They're now my favorite when I want something special without having to fire up the oven.
My friend dropped by right when these were firming up on my kitchen counter, and the smell of lime and melted butter got her to hang around for some coffee. One taste and she instantly wanted the instructions, telling me they were the most unique rice krispie treats she'd ever sampled. Sometimes the easiest recipes leave the strongest memories.
Basic Elements
- Key limes - Their sharp tangy kick is what sets these treats apart
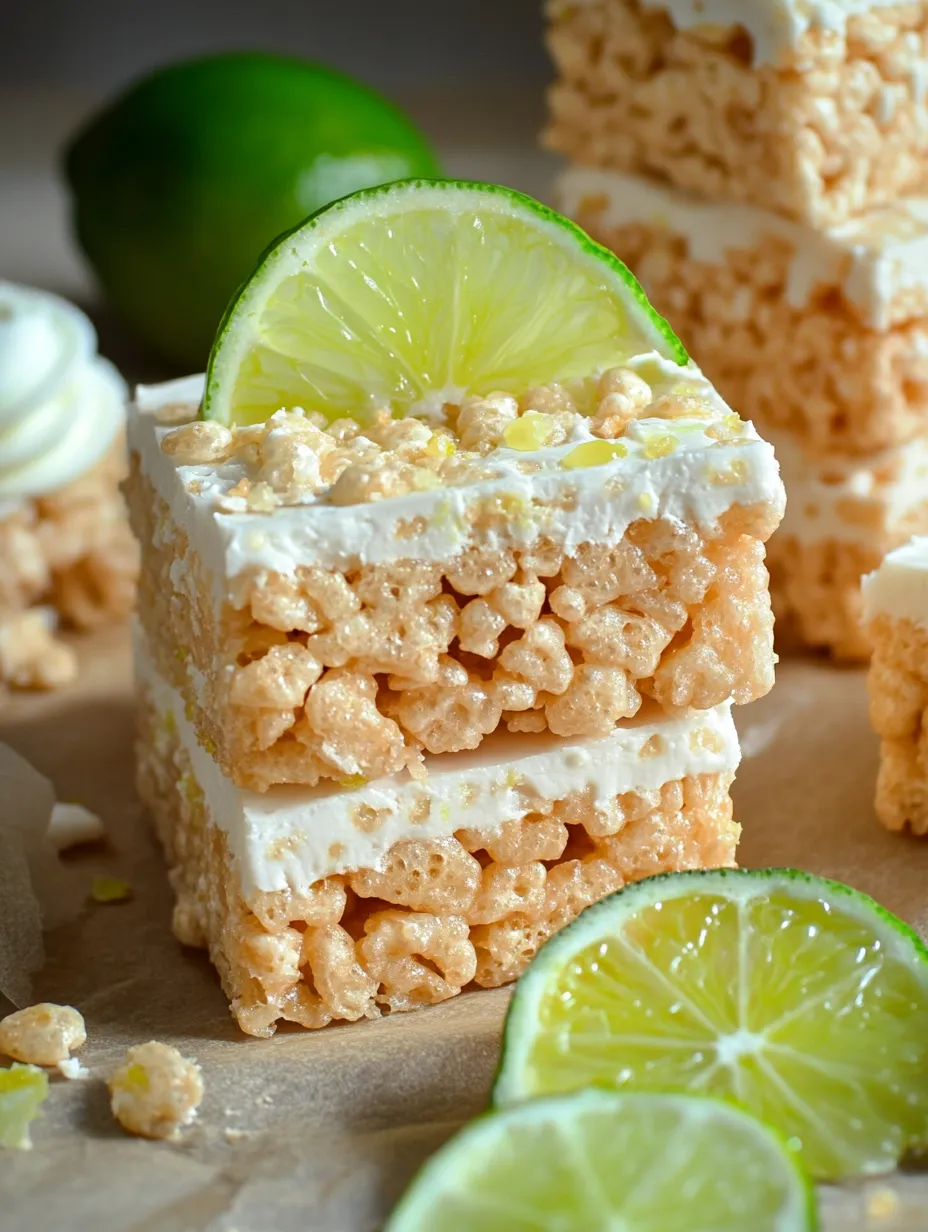
- Graham crackers - Adds that real key lime pie base feeling
- White chocolate - Brings a smooth sweetness that cuts through the sour lime
- Extra marshmallows - Those extra 2 cups create spots of soft chewiness
- Lime zest - Adds strong citrus punch and pretty green specks
 Save
Save
Making Magic
- Graham Cracker Method
- Cutting the graham crackers into tiny chunks instead of fully crushing them makes little bits of crunch all through the treats. I grab a knife instead of my food processor to keep some texture - you're looking for visible graham pieces, not just powder. Splitting them between the mix and the topping gives you that pie-crust feeling both inside and on top. The first time I made these, I ground them too small and missed out on that crispy texture that makes you think you're eating key lime pie crust.
- Marshmallow Tricks
- You need to melt the marshmallows on low heat - too hot and they'll burn, giving a weird taste. I keep stirring with a silicone tool, which won't stick to the gooey stuff like wood does. Throwing in those extra 2 cups of marshmallows at the end without fully melting them makes little spots of softness throughout. I sometimes toss in a few more than what's called for because we really enjoy that stretchy marshmallow texture.
- Lime Tips
- Real key limes make a huge difference, though normal limes can work if you're stuck. I always zest before I juice - it's way easier. When I mix the juice and zest into the melted marshmallows, I work fast before the mix starts hardening. The warmth from the hot marshmallows pulls out the oils in the zest, making the lime flavor stronger. Sometimes I add a tiny bit of green coloring if I want folks to know they're lime-flavored right away.
- Spreading Hacks
- Giving your spatula a quick spray with cooking oil changes everything when working with sticky marshmallow. I spray again if things get tacky during spreading. Instead of pushing down hard, which can make tough treats, I use light pressure to spread the mix evenly. For the best-looking edges, I spray my fingers and smooth out the corners. Working fast matters since the mix gets harder to spread as it cools down.
- White Chocolate Finish
- The white chocolate looks great and adds a sweet creaminess that works well with the sharp lime. I melt it gradually to avoid clumping, and a bit of oil helps it flow better for drizzling. Adding lime zest to the white chocolate creates small green dots in the drizzle, showing these aren't just plain rice krispie squares. I use a fork to drizzle it back and forth for the prettiest look.
- Cooling Process
- While you'll want to cut into them right away, that full hour of waiting lets the flavors blend and the texture set properly. I've found letting them sit out rather than putting them in the fridge gives the best feel - the fridge makes them too hard. If I'm rushed, I might cool them in the fridge for about 15 minutes, but no longer or they lose that perfect chewy texture that makes rice krispie treats so good.
My teen boy, who usually skips anything with citrus, took a bite of these and said they were "actually really good" - that's big praise from a kid who normally only wants chocolate sweets. There's something about that mix of familiar crunchy texture with the surprising lime taste that wins over even people who don't usually like citrus.
Tasty Companions
Enjoy these zingy treats with a warm cup of tea for a lovely afternoon break. At summer get-togethers, I put them next to fresh berries for a nice color mix on the dessert table. For brunch, they work great as a sweet option next to savory foods. My kids gobble them up after school with cold milk, while I like them with my morning coffee as a little breakfast treat.
Fun Twists
You can mix in some coconut flakes for an island vibe. Switch the white chocolate drizzle with cream cheese icing for extra tang. Play around with other citrus like lemon or orange for different flavors. Last summer, I added some tiny chopped dried pineapple pieces, which made an awesome tropical version perfect for our beach-themed party.
 Save
Save
I've brought these key lime pie rice krispie treats to everything from backyard cookouts to reading groups, and they always get people talking. There's something fun about the surprise of that tangy lime flavor in what looks like an everyday treat. My little girl now asks for them instead of cake on her birthday, which I think is the biggest cooking compliment I could get. Often the most unforgettable treats are ones that take something familiar and add a surprising twist, making something that feels both cozy and exciting at the same time.
Recipe FAQs
- → Can I swap regular limes for key limes?
- Definitely! Use 2-3 regular limes instead of 6 key limes for similar flavor.
- → How long do they last?
- Keep them in a sealed container at room temp, and they'll stay good for 4-5 days.
- → Why save marshmallows for the end?
- Adding extra at the end gives you gooey bits in the final bars, making them extra tasty.
- → Can you prep these early?
- Sure can! They're great to make a day ahead for any occasion.
- → How do I cut them cleanly?
- Let them set fully, then slice with a knife greased with cooking spray.
- → Can these be frozen?
- Yep! Wrap each one in plastic, freeze for 3 months, and thaw before eating.