
 Save
Save
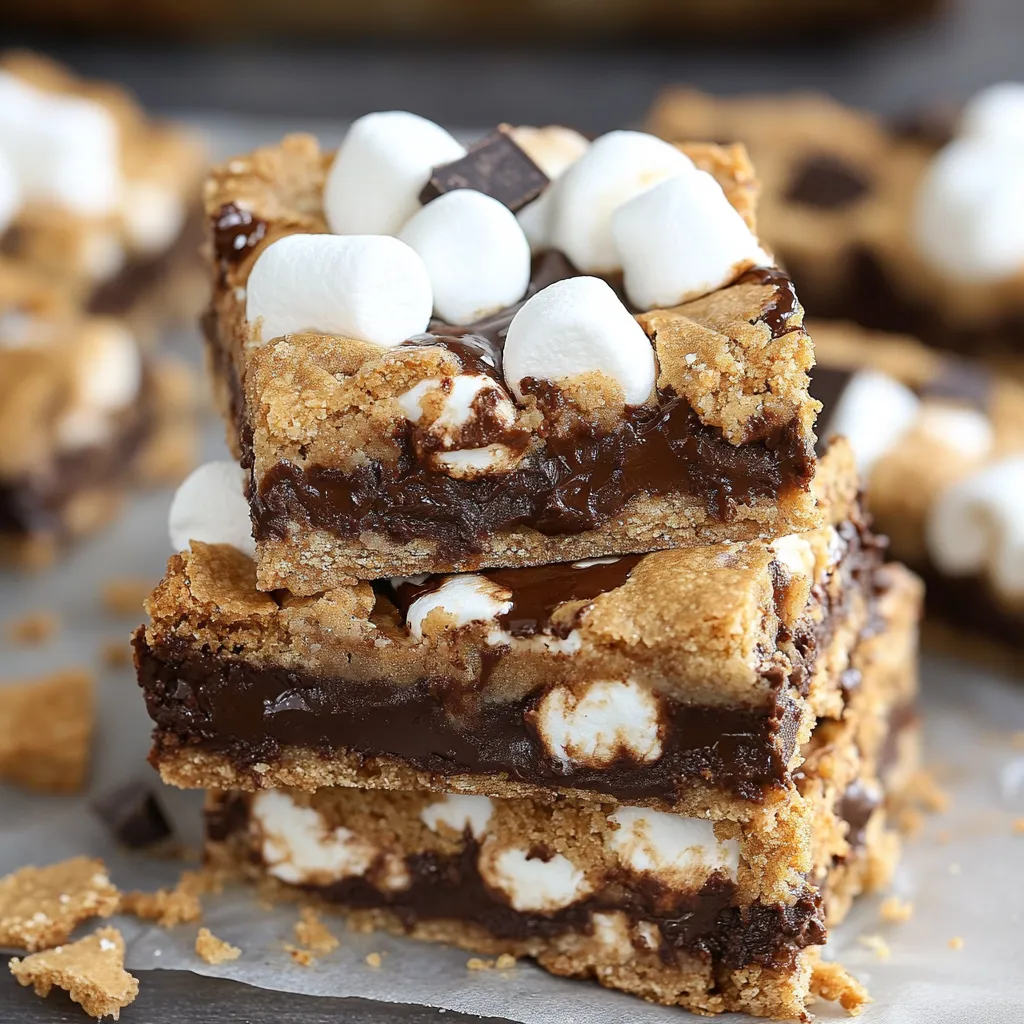
Backyard cookout classics in a single pan - that's exactly what you get with these gooey S'mores Seven Layer Bars. I whipped up this treat during a stormy afternoon when the kids were begging for s'mores but couldn't light a fire. These squares pack all the magic of traditional fireside s'mores - the golden marshmallows, gooey chocolate, and crisp graham bits - without needing to sit around a campfire or deal with sticky fingers. They've turned into our family favorite for neighborhood get-togethers, beach parties, or whenever we want a no-fuss sweet that makes everyone come back for seconds.
At my buddy's cookout last year, I brought a tray of these and they disappeared within moments. My friend's husband who kept saying he was "cutting back on sweets" quietly made three trips to grab more. When I caught him going for his fourth piece, he just smiled and told me, "These don't count as dessert - they're camping food." I couldn't help but laugh at his thinking.
Mouthwatering Ingredients
- Graham cracker crumbs: The base of any good s'more. I like to smash whole crackers myself rather than buying pre-crushed ones. You'll get some powder and some chunks, which makes the bars more interesting. Just toss them in your blender or go old-school with a bag and something heavy to pound them.
- Butter: This turns your graham bits into a solid foundation. I actually prefer using salted butter for a tiny bit of contrast against all the sweetness, though unsalted works fine too. Just make sure you melt it completely so it mixes well.
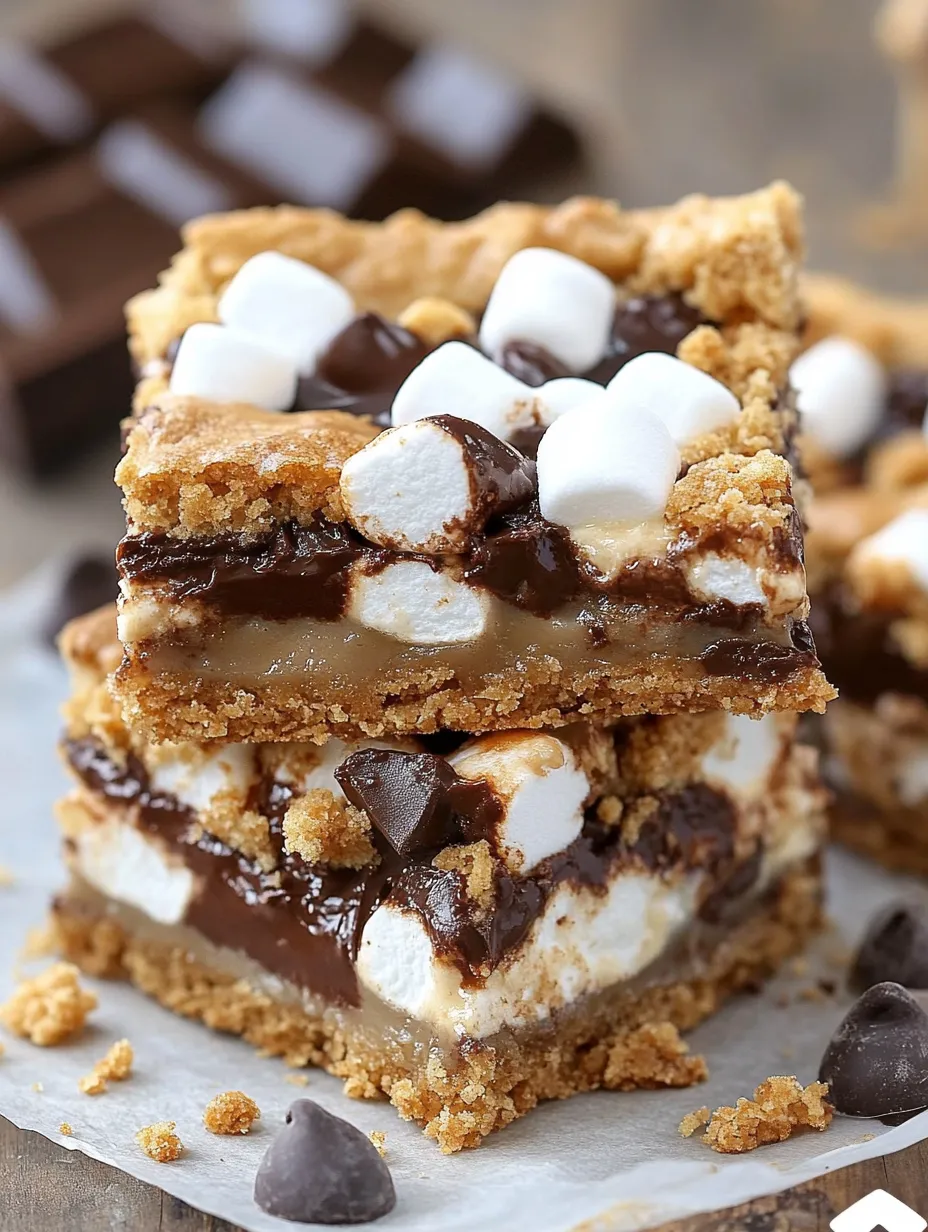
- Sweetened condensed milk: This stuff works wonders by holding everything together and creating that sticky, sweet layer. Don't grab evaporated milk by mistake - they look similar but act totally different, and your bars won't turn out right.
- Mini marshmallows: These brown up better than big ones and spread more evenly through the bars. Adding them in two batches is key - some get all melty inside while the ones on top get that lovely toasted look.
- Chocolate chips and chocolate bars: You'll want both kinds! The chips melt into little pockets throughout while the bar pieces on top give that authentic s'more look and an extra hit of chocolatey goodness.
 Save
Save
Simple Assembly
- Getting that crust just right:
- Your graham and butter mix should feel like damp beach sand that sticks when you squeeze it. Pack it down really firmly in your pan - I grab a measuring cup to press it flat. Any loose spots will make your bars fall apart when you try to cut them later.
- Nailing the sticky middle:
- Drizzle that condensed milk smoothly across the whole crust. Try to get it everywhere since it's what'll keep all your tasty toppings stuck together. Give the pan a little wiggle to help it reach the edges.
- Stacking your goodies:
- Scatter your first batch of marshmallows, chocolate chips, and graham pieces evenly. Don't go overboard - too many toppings and the bars won't set up properly. Break those graham crackers into quarter-sized chunks for the best bite.
- Getting that campfire look:
- The quick second bake after adding more marshmallows is what makes these taste like real s'mores. Keep an eye on them - you want them golden, not black. All ovens heat differently, so start checking after 8 minutes.
- Making it picture-perfect:
- Put those chocolate bar chunks on while everything's still hot so they soften and stick but don't completely melt away. Space them out so each bar gets some of that classic chocolate topping.
My first try at these taught me something about waiting. I cut into them straight from the oven and ended up with a tasty but messy pile of goop. Now I make myself wait at least 15 minutes before slicing (usually by walking away completely). I've played around with different amounts of marshmallows and chocolate over many batches and found this mix works best - too many marshmallows makes them impossible to cut without making a huge mess.
Fancy Serving Ideas
Make these squares extra special by warming them slightly and adding a small scoop of vanilla ice cream on the side. For July 4th parties, I arrange them on a wooden platter with fresh strawberries and blueberries scattered around. They also look super cute when cut small and placed in little paper cups on a dessert stand.
Fun Variations
After you've got the hang of the basic recipe, try switching things up a bit. Throw in some chopped peanut butter cups for a Reese's twist. Try using cinnamon graham crackers instead of plain ones. During Christmas, I sprinkle crushed candy canes on top for holiday flair. If you're crazy about chocolate, mix dark chocolate chips with milk chocolate bars for more depth.
Keeping Them Fresh
These bars stay good for 3-4 days in a sealed container on your counter. Put some parchment between layers if you need to stack them. You can stick them in the fridge too, which makes them firmer - great if you don't like them super gooey. For longer keeping, pop them in the freezer for up to 3 months. Just let them sit out for about an hour before you want to eat them.
 Save
Save
I've taken these S'mores Seven Layer Bars to everything from pool parties to school functions. Something about that mix of toasty marshmallows and melty chocolate brings back childhood memories and gets everyone grinning. While we'll always enjoy making traditional s'mores around a fire pit, these bars have become our go-to when we want those same flavors without the hassle. The bonus? No sticky roasting sticks to scrub, no smoke making your eyes water, and everybody gets the ideal mix of flavors in every single square.
Recipe FAQs
- → Are mini marshmallows necessary?
- Not really! Larger ones will work if you cut them smaller. Mini ones just make the bars cook more evenly and blend better.
- → What’s the best way to store these?
- Seal them in an airtight container at room temperature for 3 days. Fridge storing works too, but let them sit out before eating for the best texture.
- → Can I freeze leftovers for later?
- You bet! Wrap each square in plastic and store them in a freezer-safe container for up to three months. Just thaw at room temperature before enjoying.
- → How do I cut them without making a mess?
- Let them cool first, then slice with a sharp knife warmed up in hot water. Chilling them beforehand helps make slicing easier too.
- → What other add-ins can I try?
- Feel free to throw in extras! White chocolate chips, toffee pieces, chopped nuts, or a drizzle of caramel would take these up a notch.