
 Save
Save
Walking into my kitchen and catching that sweet mix of honey turning golden and garlic getting all soft takes me back to when I first stumbled on this dish during one of life's crazy-busy phases. This chicken saved my dinner plans countless times when I needed something that looks fancy but doesn't take much work. What makes it special is how the honey turns into this shiny coating while the garlic gets mellow and sweet, making every bite something to remember.
I made this for my nephew and niece just days ago, and watching the pickiest one in the family ask for more showed me why I keep coming back to this dish. The way she used her rice to soak up every bit of sauce left on her plate made me feel so proud.
Key Components
- Chicken breasts: Look for ones with consistent light pink coloring that feel slightly springy when touched. I've found that breasts around 8 ounces work best for even cooking
- Fresh garlic: Don't grab the jar stuff for this one. Whole cloves you mince yourself turn much sweeter when they bake
- Pure honey: This makes or breaks the dish - try getting raw honey from nearby farms for amazing flowery hints
- Low-sodium soy sauce: Gives that deep savory taste without drowning out the honey's subtle sweetness
- Apple cider vinegar: Cuts through the sweetness and helps make the chicken more tender
 Save
Save
Step-by-Step Process
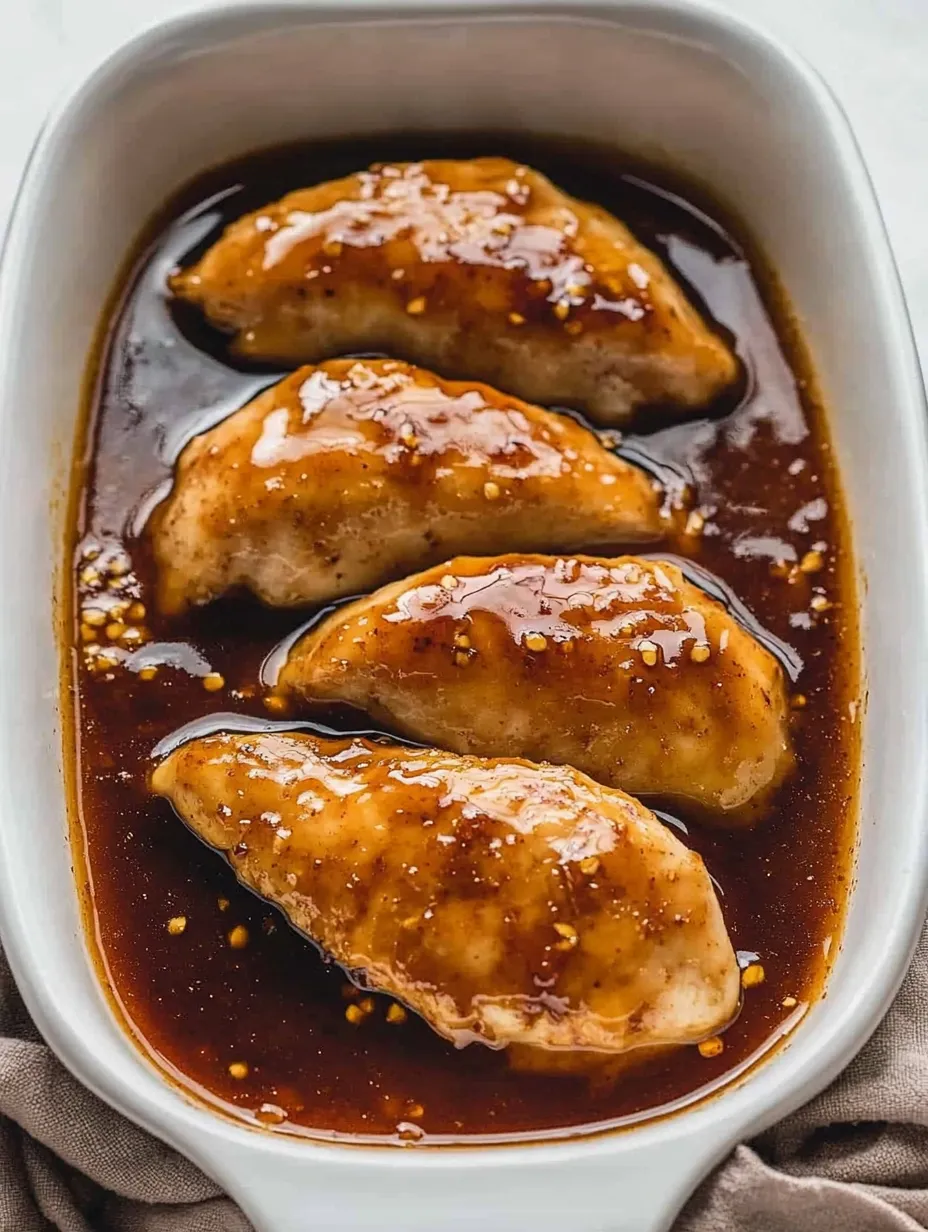
Start your cooking adventure by setting your oven rack in the middle and warming it to 375°F. As it heats up, place your chicken on a solid cutting board, and take a second to think about the tasty meal ahead. This first moment of prep always feels like starting something special in my kitchen.
Even Thickness Trick
Wrap each piece of chicken in some plastic, then gently pound the thicker parts until they're even all over. Don't go crazy with force - just think of it as encouraging the chicken to flatten out nicely. I learned this after serving partly raw, partly dry chicken for years, and it changed everything. Watch how the meat slowly spreads under your rolling pin, creating that perfect thickness for even baking.
Starting With Flavor
Dry each piece completely with paper towels, a step I used to skip until a friend who cooks professionally told me why it matters. Rub a bit of canola oil all over each piece with your fingers, then sprinkle your seasonings evenly across the surface. Arrange them in your baking dish with some space between each piece so they can brown nicely instead of steaming.
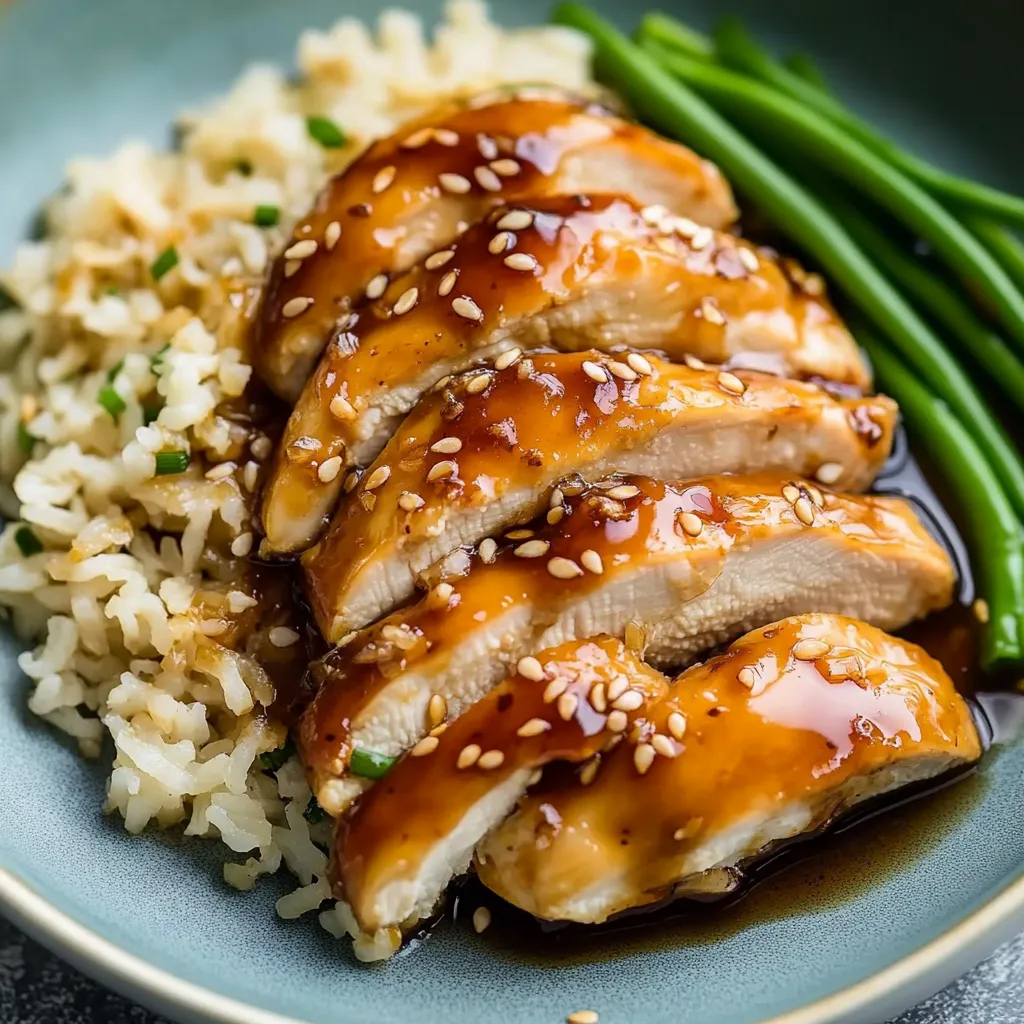
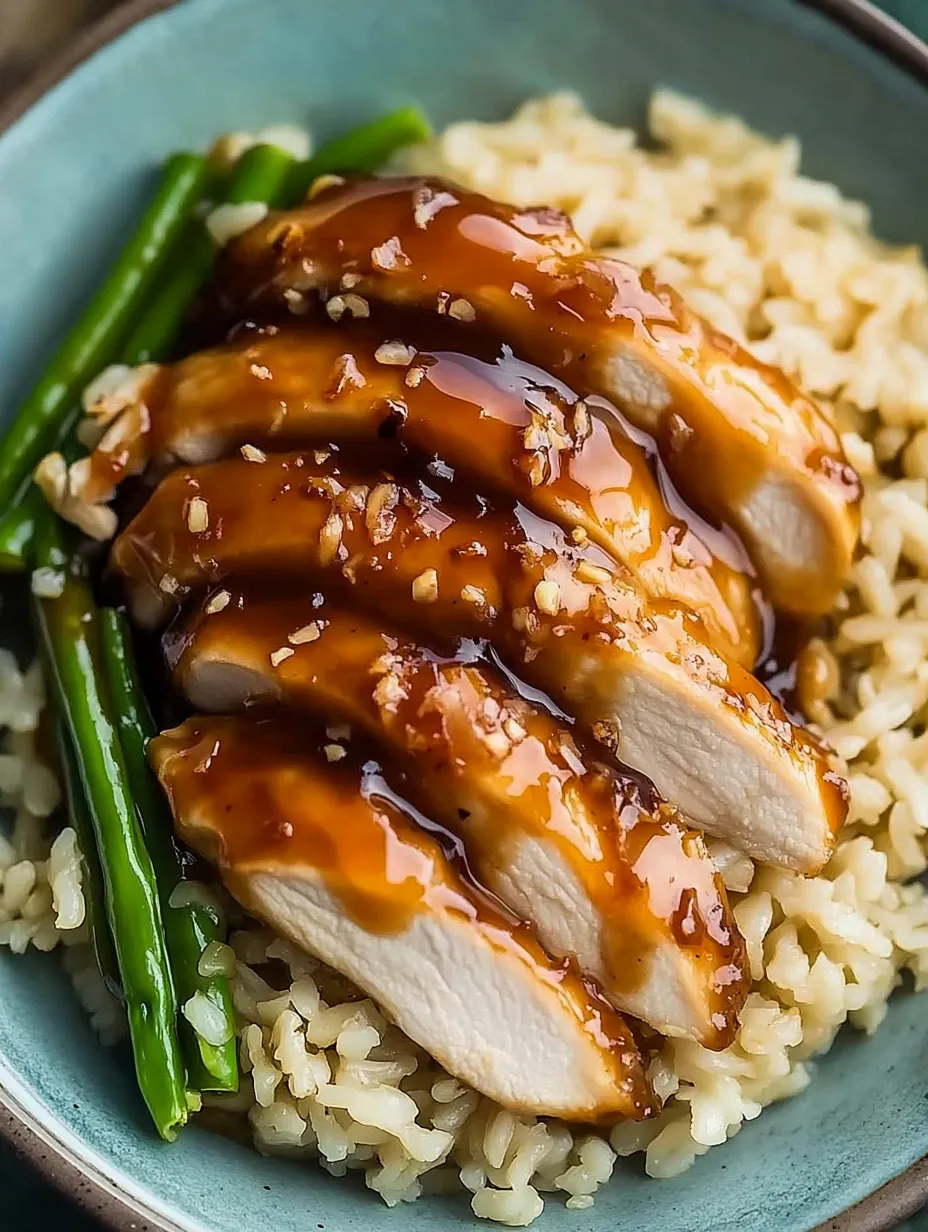
My little girl calls this her 'fancy chicken' even though we have it pretty often. The way honey keeps the meat juicy while making that beautiful amber coating turns any regular weeknight into something special.
Perfect Pairings
Make your meal complete by serving the glazed chicken with fluffy jasmine rice. The slightly sweet notes in the rice go wonderfully with the honey-garlic mixture. Throw in some bright green sugar snap peas or crispy roasted Brussels sprouts for color and crunch - their slight bitterness works really well against the sweet sauce.
Fun Variations
Try adding some freshly grated ginger for an Asian flair, or mix in a spoonful of Dijon for a French-inspired take. Sometimes I throw sesame seeds on top during the last few minutes, watching them turn golden while adding a nutty crunch. When my spice-loving family members visit, I'll toss in some Korean chili flakes for a kick that wakes everything up.
Storing For Later
Save your leftover chicken in a container with a tight lid. It'll stay good in your fridge for about four days. When you warm it up again, add a splash of chicken stock to bring the sauce back to life. For busy weeks, cut it into portions and stick it in the freezer for up to three months - you'll thank yourself later when dinner's already halfway done.
 Save
Save
After making this dish more times than I can count, I've realized its magic isn't just in how the sweet and savory flavors work together, but in how it brings everyone to the table. Whether it's just my family on a Tuesday or friends over for dinner, this honey garlic chicken somehow makes regular moments feel special. Hearing everyone scrape their plates clean and seeing happy faces around my table reminds me why I love cooking in the first place.
Recipe FAQs
- → Why pound the chicken flat?
- Making it even helps it cook all the way without drying out the edges.
- → When do I pour the sauce on?
- Halfway through baking, so it doesn't burn from the sugar.
- → How can I tell if it's fully cooked?
- Stick a thermometer in the thickest part. It should read 165°F.
- → What makes resting important?
- Letting it sit for 10 minutes keeps it juicy and tender.
- → How can I make it hotter?
- Sprinkle in more red pepper flakes for extra spice.